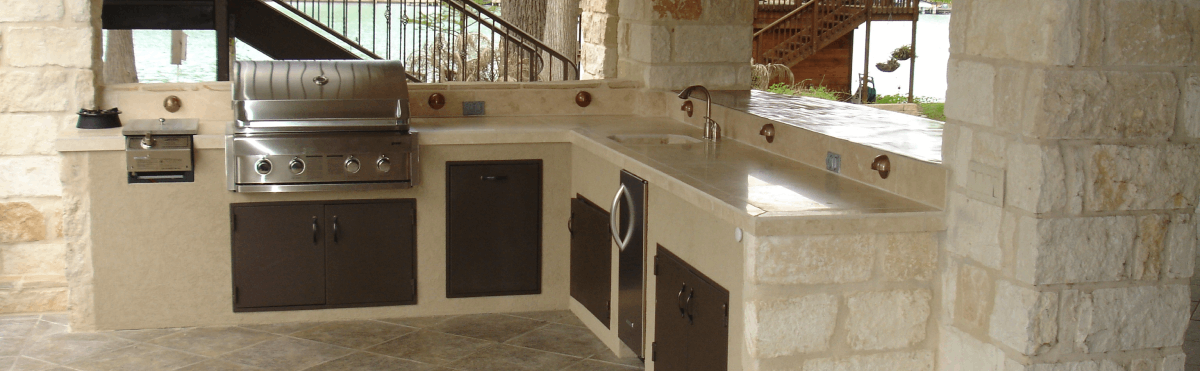

The best moment of any dinner service is the quiet just before the first ticket prints: onions glossy in the pan, the knife roll open, every container labeled and within reach. That calm never happens by luck. It’s built hours earlier, and it’s the one thing I’d steal from the line and hand to every family about to open up a house.
Planning Lake Elmo home remodeling is easier when you run the job the way a kitchen runs a service, with everything in its place before the first hammer swings. I cook for a family these days, so I’ll walk you through it the way I’d work a station: prep, cook, plate.
Prep: Get the whole house ready on paper first
Write the prep list before the wish list
Nobody on a line starts cooking from a vague idea of dinner. There’s a list, and the list has quantities. Do the same for your rooms. Take one sheet of paper and make three columns: what you love and want to keep, what drives you crazy every single day, and what you’d never notice missing.
Be specific, because specific is what a contractor can price and plan around. “The kitchen feels cramped” tells nobody anything. “There’s nowhere to set a hot pan between the stove and the sink” tells them exactly where to look. I label everything in my own kitchen, down to the leftover rice, because a label turns a guess into a decision.
Map how your family really moves
Watch an ordinary Tuesday evening before you plan anything. Notice who stands where while dinner happens and where the backpacks and wet gear end up. Where winters are long and snowy, an entry that copes with boots, mittens and slush matters as much as the stove does. The kitchen floor takes the same punishment: wet boots, dropped pans, a toddler’s cup of milk.
Then trace the route a meal takes: fridge, board, stove, table, sink. These routes are your stations, and a plan that respects them beats one that only looks lovely on a showroom wall.
Ask to see the order of work
A remodel has a sequence the way a recipe does, and you want to hear it before anyone picks up a tool. A good remodeling contractor will explain the order of work, which parts need licensed tradespeople, and what has to happen before the next stage can start. Electrical, gas, plumbing and anything involving the structure of the house belong to licensed professionals, and permits are a question for your local building department. None of it is a weekend project.
It also helps to see how a company sorts its own work. The company behind the link above gives home remodeling, bathroom remodeling and basement finishing their own pages, a handy way to see how a contractor groups its jobs.
Chef’s note: Order the slow things first. The braise goes on before the salad gets dressed, and the same logic works in a remodel. Items with long waits get chosen early, while small finishing choices like paint color and cabinet pulls can wait until the walls are up.
Cook: Live in the house while it changes
Build a temporary kitchen
Weeks without your kitchen will test everyone’s patience, so set up a working corner before demolition day. Mine looks like a pop-up station: a table, a cooler or small fridge, a microwave, a slow cooker, a kettle and one good pot. Keep it in a room that stays out of the dust, and never stack several appliances on a single outlet or cord.
Dust is the part people forget. It travels, and it settles on open dishes and on the food you’re about to eat. Store plates and pans in closed bins, wipe your temporary counter before every meal, and rinse anything that sat out before it touches food. Ask your contractor how they’ll contain dust and which rooms stay off limits.
Cook ahead so nobody lives on takeout
Here’s where batch prep earns its keep. The weekend before the work starts, I make a big pot of something that freezes well, portion it into labeled containers and stack them first in, first out, so the oldest meal gets eaten first. This soup is my default: it’s forgiving and it reheats in a microwave without complaint.
Remodel-week white bean soup (serves six to eight)
- 2 tablespoons olive oil
- 1 large onion, diced
- 2 carrots, diced
- 2 celery stalks, diced
- 3 cloves garlic, minced
- 1 teaspoon dried thyme
- 2 cans (15 ounces each) white beans, drained and rinsed
- 6 cups low-sodium broth
- 1 bunch kale, stems removed, leaves chopped
- Salt, black pepper and 1 lemon
- Warm the oil in a large pot over medium heat. Add the onion, carrots, celery and a pinch of salt. Cook, stirring now and then, until soft and sweet-smelling, about 8 minutes.
- Stir in the garlic and thyme for a minute, until fragrant.
- Add the beans and broth and bring to a gentle simmer. Cook for 20 minutes.
- Add the kale and cook until tender, about 5 minutes. Season with salt and pepper, then finish with a squeeze of lemon.
- Cool in shallow containers, label with the date, and refrigerate or freeze. Reheat until steaming hot.
That slow, gentle first step, where the vegetables soften without taking color, is called sweating. Don’t rush it. The smell that fills the room is a small comfort on a dusty week.
Chef’s note: Cool leftovers fast. Hot soup in one deep pot stays warm in the middle for a long time, and that’s where trouble starts. Ladle it into shallow containers so it chills quickly, and don’t leave it on the counter through a long afternoon of noise and distraction.
Decide on the fly, then write it down
Somewhere in the middle of the build, you’ll see a room in a new light and want to change something. Kitchens call this working on the fly: adjusting mid-service, quickly. It works on the line because everyone hears the change. On a job site, hearing isn’t enough. Ask at the start how changes are handled, and put each one in writing, with its effect on cost and timing. A good contractor will tell you the effect before the work happens, not after.
Plate: Finish it and keep it right
Taste before it leaves the pass
Before a dish goes out, the cook tastes it at the pass, the shelf where finished plates wait for the server. Treat the final walk-through the same way. Go room by room with a pad of paper: run every faucet, open and close every door and drawer, flip each light switch, and run your hand along the edges of new surfaces. Look at the room in morning light and again in the evening, because finishes change with the day.
Write every flaw on a list, however small. A list gets worked through; a vague unease gets forgotten. Agree with your contractor on who fixes what and when.
Label the new kitchen
When the boxes come off the table, resist the urge to throw things wherever they fit. Put what you reach for most closest to where you use it: oils and salt by the stove, knives by the board, plates near the dishwasher. Then label the shelves for a month, until your family’s hands remember where everything lives.
Keep a folder, paper or digital, with the care instructions for your new countertops, floors and fixtures, plus the names of the finishes you chose, so a repair or touch-up matches.
Chef’s note: Cook one ordinary weeknight dinner in the new room before you call it finished. Real cooking finds what a showroom walk never will: a drawer that blocks the oven door, a light that leaves the board in shadow, a stretch of counter with nowhere to rest a hot pan.
Clean down
At the end of every shift, the line wipes down, labels what’s left and writes tomorrow’s prep list. The habit worth keeping after a remodel is that last one. Once a week, take ten minutes to write down what the house needs next: a squeaky hinge, a caulk line that’s pulling away, a drain that’s running slow. Small jobs caught early stay small.