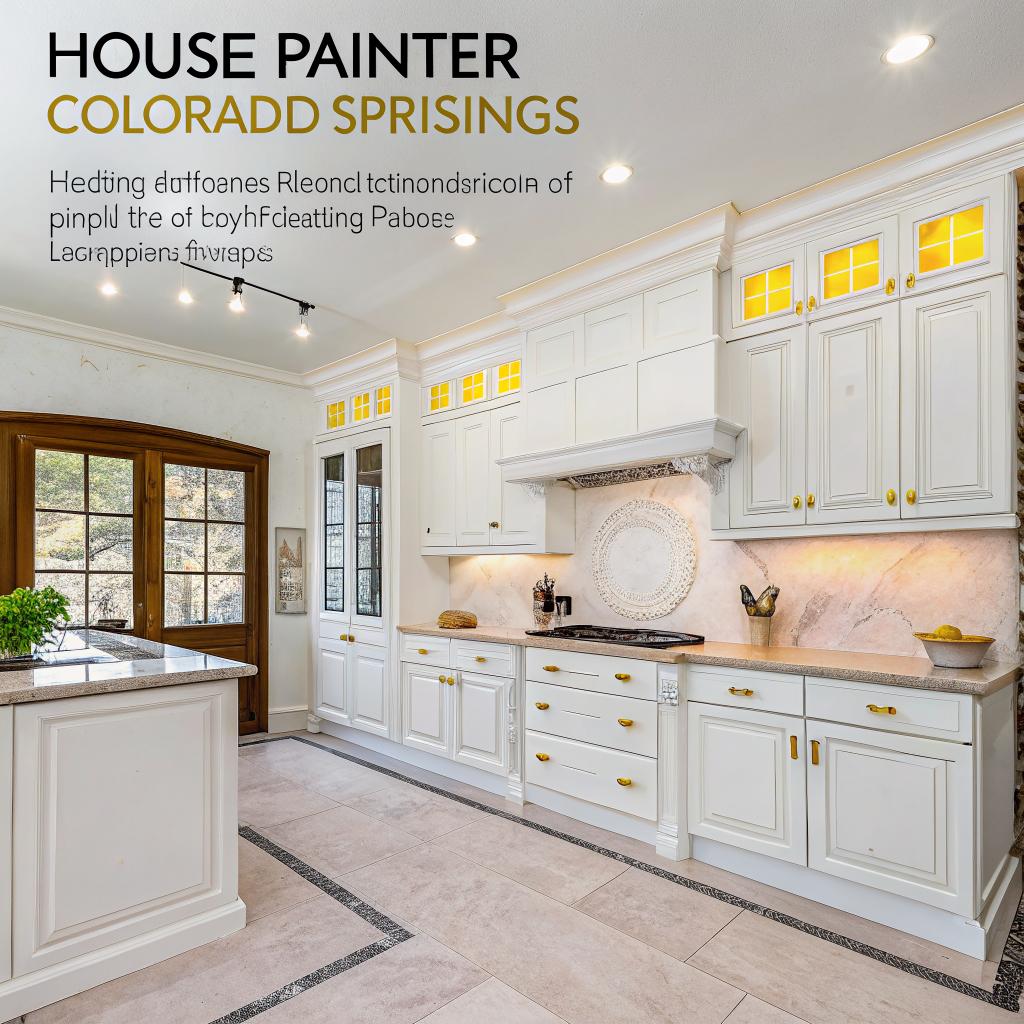
If you cook a lot at home, a good house painter Colorado Springs can change how your kitchen looks and even how you feel when you chop onions at 7 am. Fresh paint on the cabinets, walls, and ceiling changes the light, hides years of grease and steam, and makes the room feel cleaner and more inviting while you cook or host friends.
That is the short answer. The longer answer is more interesting, especially if you care about food, smells, and how a kitchen works in real life.
How paint affects the way you cook
Most people think of paint as decoration. Color, style, that sort of thing. If you spend a lot of time cooking, paint quietly affects things you notice every day.
Here are a few things that change once a kitchen is painted properly:
- The space feels brighter, so chopping and plating is easier.
- Grease and stains wipe off faster, so you spend less time scrubbing.
- Cooking smells do not cling to surfaces as much, if the right products are used.
- You feel more relaxed inviting people to eat at your place.
A good paint job in a kitchen is not only about color. It is about choosing surfaces that stand up to steam, grease, and constant cleaning.
That might sound a bit boring, but when you cook three or four times a week, it matters more than a fancy backsplash.
What a painter actually does in a kitchen
Some people picture a painter walking in with a roller, throwing a drop cloth on the floor, and starting to roll paint on the walls. In a kitchen, that would be a mistake. There is too much going on: oils, old food splatter, moisture, tight corners, lighting, and usually quite a bit of clutter.
Step 1: Looking at how you really use the kitchen
A careful painter walks the space with you first. If they do not, you probably picked the wrong person.
They will usually ask things like:
- Do you cook daily or just on weekends?
- Do you fry foods often or mostly bake and boil?
- Do you host large dinners or keep it simple?
- Do kids or pets run through the kitchen all the time?
This is not small talk. The answers change the products and the finish they choose.
| Cooking style | Kitchen problem | Paint response |
|---|---|---|
| Lots of frying | Grease on walls and cabinets | Higher sheen, scrubbable paint, extra degreasing before painting |
| Long simmering, soups, stews | Steam and moisture | Moisture-resistant primer and top coat, careful ceiling prep |
| Entertaining, wine, sauces | Splashes and stains | Stain-resistant products near range and sink |
| Kids, pets, busy traffic | Scuffs, fingerprints, dents | Durable wall paint, reinforced corners, maybe darker lower cabinets |
I once watched a painter walk into a friend’s kitchen and ask, before anything else, “Where do you drop the hot pans?” My friend laughed, then pointed to a single counter spot with burned marks. That tiny question led them to choose a darker, warmer wall color behind that zone so future marks would not stand out as much. Little details like that add up.
Step 2: Cleaning, degreasing, and fixing what you have
Kitchen painting starts with cleaning, not painting. If the prep is lazy, the paint will peel or stain quickly, no matter how good the product is.
If a painter does not spend more time on prep than on rolling paint in a kitchen, something is off.
Real prep in a cooking space usually looks like this:
- Removing or covering hardware, outlet covers, vent covers, and light fixtures.
- Degreasing walls and cabinets near the stove and high use areas.
- Sanding glossy surfaces so new coats can grab hold.
- Filling nail holes and small dents, especially near door frames and corners.
- Caulking gaps between trim and walls where crumbs and dust collect.
Degreasing might be the least fun part, but it is the most necessary. Oil and steam hang in the air above a simmering pot, then end up on the ceiling and cabinet doors. You might not see it clearly, but a painter will feel it when they run a hand over the surface.
If that layer is not removed, paint goes on streaky, or worse, it peels in thin sheets a few months later. That is heartbreaking if you just repainted your cabinets to look fresh and clean.
Step 3: Picking finishes that can handle cooking
Color gets most of the attention, but finish matters more for anyone who cooks a lot. Finishes control how light reflects and how easy surfaces are to wipe down.
| Surface | Common finish | Why it works in a kitchen |
|---|---|---|
| Walls | Eggshell or satin | Soft look with better stain resistance and easier cleaning than flat |
| Ceiling | Flat or matte | Hides minor bumps and old stains, reduces glare from overhead lights |
| Cabinets | Semi gloss or satin | Holds up to constant touching and cleaning, resists scratches better |
| Trim and doors | Semi gloss | Durable, easy to wipe, looks crisp against walls |
Some people still pick flat on kitchen walls because they like the soft look, but then they cook tomato sauce twice and regret it. A careful painter will push back a little on choices that will not last in a real cooking space. Frankly, I think that is part of their job.
How color changes appetite, mood, and light
If you cook, you already know color matters on a plate. There is a reason chefs think about contrast: green herbs, red sauces, golden crusts. The same thing happens in a kitchen, just on a bigger scale.
Warm vs cool colors around food
Some research suggests that warm colors like soft reds, oranges, and yellows can gently increase appetite. Cool colors like blues and some greens feel calmer and a bit more restrained. I do not think this is a strict rule, but you can feel it in restaurant design.
In a home kitchen, you might see patterns like this:
- Warm neutrals make breakfast corners feel cozy.
- Cool grays and off whites feel more modern and calm for long cooking sessions.
- Muted greens often feel fresh, which works well near produce and herbs.
Color should support how you cook, not fight with it. If you love bold spices and lively family dinners, pale cold colors might feel a bit flat.
If you plate bright dishes, a softer, neutral wall helps the food stand out against the room. If your cooking style is simpler, a richer wall color can give the whole space some personality.
Working with natural light and artificial light
Kitchens are tricky because lighting changes a lot throughout the day. In the morning, you might have bright sunlight on one wall and shadows on another. At night, you rely on overhead fixtures, under cabinet lights, or whatever the builder installed years ago.
A painter who knows what they are doing will look at the kitchen in both daylight and artificial light before finalizing colors. Colors that seem perfect at noon sometimes turn gloomy under warm bulbs at night.
For example:
- A pale gray with a blue undertone can feel clean at noon but too cold under cool LED lights at dinner.
- A beige with a strong yellow tint might look warm in the morning but almost sickly near warm under cabinet lights.
- Pure white cabinets can glare under bright LEDs and show every fingerprint.
Testing real swatches on the wall and near cabinets, then looking at them while cooking dinner, is a simple trick. It saves you from choosing a color that looks great in the paint store and strange next to your favorite dishes.
Cabinet painting: the biggest change for most kitchens
Cabinets are usually the largest visual element in a kitchen. Changing their color can feel like you installed a new kitchen without replacing boxes or doors.
Refinishing vs replacing cabinets
New cabinets are expensive, and the process is disruptive. A skilled painter can refinish solid or good quality laminate doors so they look completely different.
Refinishing often includes:
- Removing all doors and hardware.
- Labeling everything so it goes back in the right place.
- Cleaning and sanding or deglossing existing finishes.
- Repairing chips and dings.
- Spraying or brushing primer and multiple top coats.
Sprayed cabinets tend to look smoother, closer to a factory finish. Rolled and brushed cabinets can still look good, but in a slightly more hand painted way. Some people prefer that. Others want that perfect, sharp edge look. It is fine to be picky here; you use those doors every day.
Popular cabinet color approaches for people who cook a lot
Trends come and go, but a few ideas work well for kitchens that actually see daily cooking.
- Two tone cabinets
Darker lowers, lighter uppers. The darker color hides scuffs near knees and kicks from kids. The lighter top keeps the room from feeling heavy. - Soft, warm whites
These pair well with most countertops and make food look nice on open shelves. Pure, cool white can feel clinical, which is not ideal when you want guests to relax. - Deep blues or greens on an island
If you have an island where guests sit with a glass of wine while you cook, a rich color anchors the space without taking over the room.
Cabinet color should work with your countertops, floors, and backsplash. If those are staying, a painter often starts by taking samples of those surfaces to match undertones.
One small example: if your countertop has a lot of warm beige and your floor leans red or orange, a cool gray cabinet can clash quietly in the background. You may not know why the room feels slightly off, but you will feel it. An experienced painter sees that right away.
Dealing with stains, smoke, and cooking smells
If you love to pan fry, grill indoors, or cook with strong spices, your kitchen absorbs it all over time. Paint can help contain this, but only when the right primers and finishes are used.
Blocking stains and old odors
Smoke from high heat cooking, candles, or past smoking indoors can leave yellowish stains on ceilings and walls. Steam brings grease up to the ceiling. Regular paint alone does not always cover this for long.
For serious staining or odor, painters use stain blocking primers. These seal in old marks and help prevent them from bleeding through the new top coat.
| Problem | What a painter does |
|---|---|
| Nicotine or heavy smoke stains | Deep clean, then stain blocking primer before painting |
| Grease near range and hood | Strong degreaser, sanding, then bonding primer |
| Old water stains from steam or leaks | Repair and dry area, stain blocking primer, then top coat |
If you have ever painted a stained ceiling with regular paint and watched the yellow marks show through again a month later, you know why this matters.
Choosing paints that handle cleaning
In a kitchen, you wipe surfaces constantly. Tomato sauce splatters. Coffee splashes. Oil spatters on the wall behind the stove. Not every paint holds up to this level of cleaning.
Higher quality trims and cabinet paints usually:
- Resist staining from common kitchen splashes.
- Allow repeated scrubbing without getting shiny patches.
- Stick better to previously finished surfaces.
This is one place where going for the cheaper option often creates more work later. You end up touching up more often, or accepting that the wall near the stove always looks slightly dirty, no matter how hard you scrub.
Making the kitchen feel more like a restaurant, if you want that
Since this topic connects to cooking and restaurants, it is fair to ask: can a house painter borrow ideas from restaurant kitchens and dining rooms?
Small restaurant inspired choices for home kitchens
You may not want stainless steel everywhere, but you can learn from how restaurants plan their spaces.
- Clear work zones
Use color to suggest zones: a darker, practical color near heavy cooking, lighter colors around eating areas. - Matte ceilings with focused lighting
Restaurant kitchens often avoid glare above. A flat ceiling paint with thoughtful lighting keeps the focus on your prep area and countertop, not on a shiny ceiling. - Simple, neutral backgrounds
Many restaurants keep walls calm so plates pop visually. In a home kitchen, neutral walls help your cutting boards, produce, and cookware stand out.
On the dining side, if your kitchen opens into an eating area, a painter can shift the feel with just a subtle color change. A slightly deeper shade where the table sits can make that area feel more intimate, which works well for slow dinners.
Practical planning: timing, smell, and keeping your kitchen usable
One thing that people sometimes overlook is the timing of a kitchen paint job. If you cook daily, losing access for several days can be stressful.
Planning around your cooking schedule
You and the painter can plan the work in phases. For example:
- Day 1: Walls and ceiling on one side of the kitchen while the other side stays open.
- Day 2: Remaining walls and detail work.
- Cabinets: Doors taken offsite to be sprayed while frames are done at home.
This way, you might still use the stove at night, even if it is a bit awkward. That is often better than ordering takeout for a week, although some people see that as an excuse to try new restaurants.
Ventilation and paint smell
Modern paints, especially low VOC products, bother people less than older formulas, but smell still exists. A painter should keep windows open when possible and may use fans to move air out.
If you are sensitive to smells, schedule most of the work when you can be at work or out of the house during the day. Let the room air out at night with a fan if needed.
Questions to ask before you hire a kitchen painter
You do not need to be an expert, but you should ask a few direct questions. If an answer feels vague, pause and think about it. You are not being difficult. You are protecting the space you cook in.
Good questions to bring up
- How many kitchens have you painted in the last year?
- What products do you like for cabinets, and why those brands?
- How do you handle greasy areas near the stove before painting?
- Do you spray or brush cabinets, and can I see photos of both types of finishes?
- How long will we be without cabinet doors or full use of the kitchen?
- What is your plan if stains or old colors bleed through the first coat?
You can also ask for references or photos from other kitchen projects, not just bedrooms or living rooms. A good painter will usually be happy to talk about what worked and what did not in past kitchens. That kind of honesty is more useful than a perfect sales pitch.
Balancing what you want with what will last
Every kitchen has limits. Maybe your countertops are staying for now. Maybe the tile is not your favorite, but it is not in the budget to replace. Paint is often the tool that ties everything together so the room feels intentional, even with older pieces.
Sometimes what you want and what will last do not line up perfectly. For example, someone might want flat white walls around a frequently used gas range. A painter might gently suggest an eggshell finish or a soft off white instead, which is easier to wipe and stays looking fresh longer.
You can push back if something matters a lot to you, but it is worth listening when a painter says “I tried that for someone else, and it did not hold up well around heavy cooking.” That kind of practical feedback comes from experience, not from a paint catalog.
Kitchen repaint: a real world example
To make this more concrete, imagine a small Colorado Springs kitchen in a townhome. Dark oak cabinets from the early 2000s. Beige walls that turned slightly yellow near the stove. A family that cooks almost every night: stir fries, pasta, roasted vegetables, nothing fancy, but consistent use.
They want a lighter, cleaner look without replacing cabinets. Here is how a good painter might handle it.
What changes
- Cabinets go from dark oak to a soft, warm white on top and a light gray on the bottom.
- Walls shift from beige to a light, neutral gray beige that works with the existing granite.
- Ceiling gets a fresh coat of matte white to clean up old steam marks.
- Trim and door frames move to a crisp semi gloss white.
The painter spends the first day on prep: washing, sanding, taping, and protecting appliances. Cabinet doors go to a workspace to be sprayed. During this time, the family still uses the stove and sink, even though everything looks half finished.
A week later, the doors return, hardware is reinstalled, and the room feels brand new. The stovetop still has the same burners. The same pots hang on the wall. But the light bounces differently, and the whole kitchen feels bigger and cleaner.
The family says they are cooking even more at home now. Maybe some of that is just the new feeling. Maybe part of it is that cleaning up feels less like a battle against stains.
Questions and answers
Q: If I cook a lot, what is the single most important paint choice for my kitchen?
A: Finish matters most. Pick washable, durable finishes on walls and semi gloss or strong satin on cabinets. Color is flexible, but if you choose a paint that cannot handle scrubbing, you will be unhappy pretty fast.
Q: Can painting really change how big my kitchen feels?
A: It does not change the physical size, of course, but lighter colors and consistent finishes can make a space feel more open. Dark upper cabinets in a small kitchen can feel heavy, while lighter uppers with darker lowers often feel more balanced.
Q: Do I need to stop cooking completely while my kitchen is painted?
A: Not always. Many painters can plan the work in stages so you still have limited access at night. For cabinet spraying, some of the work might happen offsite. You might still eat a few meals out, though, just for convenience.
Q: Is cabinet paint as strong as factory finishes on new cabinets?
A: High quality cabinet paints and proper prep can come close. They might not match every factory finish in a lab test, but in a real kitchen, they hold up very well. The key is sanding, cleaning, priming correctly, and giving each coat enough time to cure.
Q: If I want my kitchen to feel a little more like a small restaurant, where should I start?
A: Start with a simple, neutral wall color that lets your food and cookware stand out. Keep the ceiling soft and non glossy to avoid glare. Then decide on one focal point, like a rich color on the island or a deeper accent near the dining table. From there, let your cooking style guide more choices instead of chasing trends.