Outdoor dining in Honolulu gets better when a pro shapes the space for comfort, flow, and food appeal. The short version is this: shade you can trust, seats that feel private but not isolated, lighting that flatters dishes, plants that smell nice without being loud, and details that keep wind, rain, and pests from stealing the show. When you work with landscape designers Honolulu HI, you get a team that knows the trade winds, salt air, and busy dinner rush. That mix matters, because great food tastes better when the setting helps instead of fights you.
What an outdoor dining space needs to succeed in Honolulu
Let’s keep this practical. Honolulu brings warm sun, trade winds, salt spray, short rain bursts, and happy crowds. You need a plan that turns those into assets.
– Shade that cools without blocking the view
– Wind control that softens gusts but lets air move
– Rain response that keeps guests dry and staff calm
– Non-slip surfaces that clean fast
– Lighting that makes plates look fresh
– Plants that fit the menu, not just the mood
– Clear paths for servers and guests
– Materials that resist corrosion
Comfort drives dwell time, and dwell time drives spend. Get the comfort right first.
I know this sounds simple. It is not always simple. The sun is lower in winter and higher in summer. Wind can flip umbrellas on certain corners but not others. The fix is a site read. Pros map sun angles, wind patterns, and runoff. A one-hour walk at 4 pm tells you more than a week of emails.
Layout that makes service faster and guests relaxed
People notice when their chair gets bumped. They also notice when the server arrives right when they want water. Those two goals live in the layout.
– Primary guest paths should be direct and obvious
– Service paths should be separate when possible
– Table clusters should feel intimate, not cramped
– Host stand needs shade and a clear line of sight
– Staging for trays, bussing, and POS has to be close but quiet
– ADA access is non-negotiable
Here are simple dimensions that work well. Yes, there are exceptions, but these numbers hold up on busy nights.
| Element | Target Dimension | Notes |
|---|---|---|
| Main guest path | 60 in clear width | Comfortable two-way flow |
| Server aisle | 48 in clear width | Fewer collisions during peak |
| Table spacing | 18 to 24 in between chairs | Privacy without wasted space |
| ADA route slope | Max 5 percent | Ramps at 8.33 percent if needed |
| Wheelchair turning radius | 60 in diameter | Keep corners clear |
| Knee clearance at tables | 27 in high, 30 in wide, 19 in deep | At least one per cluster |
| Table height | 28 to 30 in | Match indoor standard |
| Seat allowance | 12 to 18 sq ft per person | Lower for bar seating, higher for full service |
If guests can see where to go without asking, you already removed friction from the experience.
Circulation patterns that actually work on Saturday night
I learned this the hard way watching a patio in Kakaako. The bar was the star, but the aisle squeezed to 36 inches by a planter. Looked cute at 3 pm. At 7:30 pm it was a traffic jam. Two weeks later, the planter moved 18 inches and the jam vanished. It felt too small before. Then it felt right. That is what I mean by testing the pattern.
Try this simple run-through before you build:
– Set up tape on the ground at full size
– Place temporary tables and chairs
– Walk it with 3 staff carrying trays
– Play ambient noise on a speaker to mimic service
– Time a sample route from kitchen to farthest table and back
If the route takes too long or forces too many tight turns, change it now. Small moves pay off later.
Shade, wind, and rain: a comfort plan that fits the climate
Honolulu sun can be strong, even with the breeze. You need shade that is steady, safe, and not ugly.
– Fixed roofs or pergolas for primary zones
– Tension sails or louvered structures where flexible shade helps
– Large umbrellas with 100 lb bases for small tables
– Plant shade with trees only where roots and litter will not fight the floor
Aim for 30 to 50 percent shade at midday. More than that can feel dark. Less than that and guests squint.
Wind is a friend until it is not. Break up gusts with layered edges:
– Glass wind screens at 42 to 54 inches high where needed
– Dense hedging like podocarpus or clusia on the windward side
– Lattice with vines to slow air without blocking it
Rain is short and sharp. Give it a place to go.
– Slope floors 1 to 2 percent away from diners
– Use gutters and downspouts that drop into planted swales
– Keep umbrellas tilted and secure even when folded
Shade, airflow, and dry feet solve 80 percent of outdoor comfort. The other 20 percent is small details like glare and seat feel.
Materials that survive salt and spills
Salt air is tough on hardware. Drinks spill. Food stains. Plan for it.
Use:
– 316 stainless steel for hardware and cables
– Powder-coated aluminum for frames
– Teak or ipe with regular oiling for tabletops
– High-density polyethylene for woven seating
– Porcelain pavers with high slip resistance
– Permeable pavers in gravel beds for drainage
– Marine-grade fabrics for cushions and umbrellas
Avoid:
– Plain steel that will rust fast
– Softwoods near ground contact
– Glossy tile that gets slick when wet
– Thin grout joints that trap grease
– Low-quality string lights with cheap sockets
Wet slip resistance matters. Aim for a wet dynamic coefficient of friction around 0.6 or higher on walking surfaces. It sounds technical. It is maybe the least glamorous spec that saves the most headaches.
Lighting that makes food look great
Lighting changes how food looks in photos and in real life. Warm tones flatter skin and plates. Harsh glare makes greens look gray. You do not need a light show. You need a simple plan.
– Color temperature around 2700K for dining areas
– High CRI, near 90, for accurate food color
– Layered lighting: ambient, task, accent
– Shielded fixtures to cut glare
– Dimmers and simple controls
Here is a quick table you can share with your team.
| Lighting Layer | Spec | Placement | Purpose |
|---|---|---|---|
| Ambient | 2700K, CRI 80+ | String lights, downlights | Base light level, mood |
| Task | 2700K, CRI 90+ | Sconces near menus, bar lighting | Reading, service |
| Accent | 2700K, CRI 90 | Uplights on plants, wall grazers | Depth and scene |
| Kitchen pass | 3000K, CRI 90+ | Under-shelf and overhead | Plate checking |
| Safety | 2700K, shielded | Step lights, path markers | Wayfinding without glare |
Warm light at 2700K sounds small. It is not small. It can make seared ahi and lilikoi sauce look rich instead of flat.
Use 2700K and high CRI near the table. Your dishes will look like they did in the kitchen.
For controls, keep it simple. A single time clock with a photo sensor and manual override is fine. Staff can bump levels down after sunset. Smart systems are nice, but I have seen simple switches save the night when a tablet app froze.
Bug note. Lower color temperature attracts fewer insects than cool white. Fans also help. Air movement discourages mosquitoes more than any plant ever will. Citronella in a pot smells nice but is not a real solution by itself.
Plants with purpose: privacy, aroma, and the menu
Plants are not just decor. They can support the menu and the brand. They also set the edges so guests feel tucked in without being hidden.
Try plants that thrive in Honolulu and play well with dining:
– Edible and bar-friendly: Thai basil, Hawaiian chili pepper, mint in containers, lemongrass in planters, shiso, kaffir lime in large pots, rosemary near the kitchen, chives, Tahitian lime if you have space
– Soft screens: clusia, podocarpus, dwarf schefflera, areca palm away from wind tunnels
– Color without mess: ti, croton, bromeliads in planters, heliconia in corners
– Natives that like the coast: naupaka for borders, akulikuli as groundcover in sunny spots, ilima papa in planters
– Vines for lattice: jade vine for wow factor but give room, passionfruit if you can handle harvest and a few birds
Plants to think twice about near tables:
– Plumeria over seating, because of sap and flowers dropping
– Bird of paradise where foot traffic is tight, because the leaves tear and look tired
– Coconut palms over diners, for obvious reasons
– Anything with sharp thorns in reach, like some citrus or bougainvillea
Scent that helps, not hurts
A hint of herb is nice. Overpowering scent while eating can be rough. Place aromatic plants downwind of seating, not upwind. Mint travels. Basil is softer. Jasmine can take over a night. I like lemongrass near the edges because it gives a fresh smell and works well in the kitchen. But I would not put it right under a table. The blades are rough on skin.
Grow what you serve. Let guests see it, but do not let it poke them or fall on their plates.
If you feature a garden, tell the story. A small sign near the herb planters with three bullets about what you grow is more than enough. Guests read it while waiting for a table. It adds value without a big production.
Sound control that feels natural
Outdoor sound bounces off walls and hard floors. Add soft surfaces and water to soften it. This is not about being silent. It is about the right hum.
– Use planters with dense foliage along hard walls
– Add a modest water feature near street noise, not by quiet tables
– Choose wood slats or cane webbing panels on select walls
– Avoid hard domes overhead that reflect sound right back
Test with a decibel app during service. Aim for 60 to 70 dBA at tables. Busy but not loud. If you push 75 dBA often, guests will lean in too much and stay shorter. I think a small speaker system with many low-volume speakers beats two loud ones. Even coverage is the goal.
Water and power behind the scenes
Every patio needs hidden plumbing and power. If you plan these late, you pay more. If you plan them early, you save staff steps.
Water:
– Drip irrigation with pressure regulation for planters
– Separate zones for sun and shade areas
– Quick couplers for fast hose connection during cleanups
– Backflow prevention as required
Power:
– GFCI outlets in weatherproof boxes near service stations
– Extra outlets for pop-up events and string lights
– Low-voltage lighting with accessible transformers
– Dedicated circuits for heat lamps if you use them
I like to add one extra conduit to any main planter run. It costs little now and saves headaches when you add lighting later. Small choices like that are what seasoned teams do.
Budget, phasing, and ROI that make sense
You care about seats, spend per head, and turns. The setting influences all three. Costs vary by site, but these ranges fit many Honolulu projects I have seen.
– Basic refresh with furniture, planters, and string lights: 50 to 100 dollars per square foot
– Mid-scope with pavers, irrigation, lighting, and shade sails: 120 to 200 dollars per square foot
– Full build with structure, grading, drainage, planting, and controls: 220 to 350 dollars per square foot
Common line items:
– Shade sails with 316 hardware: 6,000 to 18,000 for a medium layout
– Pergola with lighting: 20,000 to 60,000 depending on size and finish
– Porcelain pavers installed: 18 to 30 per square foot
– Low-voltage lighting package: 8,000 to 25,000
– Planters with irrigation and plants: 300 to 900 per linear foot depending on size and species
I know, numbers are not exact. They never are. But a rough map helps you pick a path.
What about returns? Here is what operators often see, and I say this with caution because every site is different.
– Extra 20 to 40 seats on even a modest patio
– Average check lift of 5 to 12 percent when the setting is comfortable and the lighting is right
– One more turn on nice nights during peak season
If the patio adds one full turn on weekends and a half turn on weekdays, your payback window gets short very fast.
One Waikiki cafe I visited added 28 seats with a pergola and planters. They reported ticket times got faster because aisles opened up, not slower. The GM also said guests lingered for dessert. That meant more coffee sales. It was not just the seats. The feel mattered.
Permits, rules, and safety without the headache
I am not a lawyer or inspector, and I will not pretend to be one. I will say this. Work with a team that knows local rules, and ask simple questions early.
– Do you need a permit for the structure or shade?
– Will drainage changes trigger review?
– Are you adding power that needs inspection?
– Do you have a clear egress path to the street?
– Is the sidewalk dining area allowed at the width you want?
Safety basics to keep top of mind:
– Clear exits with signage
– Heat lamp spacing away from fabric and greenery
– Tiki torches or gas features with shutoff valves and safe distance
– Slip resistant floors and visible step edges
– Night lighting on stairs and grade changes
If your patio crosses public space, the City and County has rules. Follow them. A good project manager will guide that process. Oceanic Landscaping and other local teams have done this many times. Lean on that experience.
Maintenance that keeps the space fresh
A great patio that looks tired in three months was not a great plan. Write the maintenance plan with the design, not after it.
Weekly:
– Wipe and rinse surfaces at open and close
– Check and clean string light sockets
– Prune herbs lightly for new growth
– Sweep and hose with the right cleaner for your pavers
– Check umbrella bases and tighten hardware
Monthly:
– Deep clean pavers and grout lines
– Inspect irrigation lines and emitters
– Trim hedges and check for pests
– Oil wood tables if needed
– Test lighting controls and replace weak lamps
Quarterly:
– Power wash with care
– Fertilize planters as needed
– Inspect shade hardware for corrosion
– Review layout with staff and tweak based on service notes
Annual:
– Evaluate fabric lifespan on cushions and umbrellas
– Re-seal wood and pavers where specified
– Review plant health and replace underperformers
A small logbook near the host stand can track these items. It sounds boring. Boring is good here. It keeps the space clean and safe.
Working with local designers in Honolulu
People often ask why local matters. The wind pattern on one block can differ from the next. Salt air wears fixtures faster near certain exposures. Local designers see these patterns daily. That helps you avoid mistakes that photos cannot show.
Typical process that works well:
– Site walk at lunch and early evening
– Quick measurements and a base map
– Concept plan with zones, paths, and shade ideas
– Plant palette with a short list of proven species
– Lighting plan with fixture counts and sample photos
– Budget range tied to each option
– Mock dinner setup with cones and tape to test flow
– Final plan with permit-ready notes
– Install with clear phasing so dining can continue
– Staff handoff with a maintenance cheat sheet
Ask honest questions during selection:
– What did you build nearby that I can visit?
– How do you handle wind on this block?
– Which paver and grout combo holds up best by the ocean?
– How do you keep irrigation from spraying guests?
– What is your plan when it rains at 6 pm on a Friday?
You want real answers. If you hear vague talk or big claims, push back. A grounded plan beats a pretty rendering that fights the climate.
I will add one more thought. Outdoor dining and good food is an easy sell in Honolulu. You do not need gimmicks. You need a space that lets people relax, talk, and enjoy the plate in front of them. If the design fades into the background and the meal shines, that is a win. Oceanic Landscaping and other local teams get that. It is why the projects that age well tend to share the same simple moves.
Common mistakes to avoid
I keep a short list on my phone. I pull it out at the start of every patio job.
– Overplanting near chairs, leading to spills and stains
– Small umbrellas where a fixed shade would be safer
– Cool white lighting that makes food look dull
– Narrow server aisles that choke at peak
– High-maintenance materials with no maintenance plan
– Ignoring drainage at the lowest point of the patio
– Planting messy fruit trees over walkways
– Running irrigation at dinner time
– Forgetting to create a quiet zone for date nights
If you are thinking, I have done one of those, same here. Everyone has. The key is to learn and adjust.
A quick case sketch from Oahu
A small bistro on Oahu had 42 indoor seats and a hot concrete front yard used as a waiting area. They wanted to seat outside but worried about wind and street noise. The team added a 24 by 32 foot pergola with a simple slat roof, porcelain pavers over a gravel base, a hedge of clusia at 48 inches high, and low-voltage lighting at 2700K with CRI near 90. They placed herbs in modular planters along the bar and used 316 stainless cables for bistro lights.
What changed:
– Seating grew by 26
– Average check rose by 9 percent, mostly desserts and cocktails
– Table turns held steady because server aisles were wider and POS was closer
– Guests took more photos of plates, and the photos looked better
Was it perfect? No. They had glare from one angle at sunset in summer. A simple shade screen fixed it. They also learned to trim the lemongrass lower. Small things. But the gains were real.
Menu and design working together
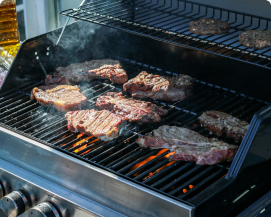
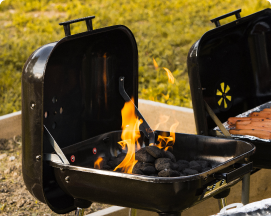
Design serves the menu. If you do a raw bar, place it where guests can see it without blocking seating. If you serve a lot of grilled items, make sure the smoke never drifts across tables. If your cocktails use mint and basil, grow them where bartenders can cut fresh sprigs before service.
Here is a small planning grid that helps align both worlds:
| Menu Feature | Design Support | Notes |
|---|---|---|
| Raw bar | Front-facing counter, shaded, dedicated drain | Use task lighting with high CRI |
| Grill focus | Wind-aware placement, exhaust path away from guests | Consider light screens to direct smoke |
| Herb-forward cocktails | Planter bench near bar, drip irrigation | Harvest before peak to avoid mess |
| Dessert program | Photo-friendly accent lighting near tables | Lower light, warm tone for mood |
| Family dining | Wider aisles and one stroller zone | Path to restroom with clear signs |
This is simple cross-talk. Your chef, GM, and designer should align on two or three menu items that the space should amplify.
Phasing without closing your doors
Many restaurants cannot shut down for weeks. Smart phasing keeps cash flow going.
– Phase 1: Lighting and planters you can add after close
– Phase 2: Shade and furniture over two mornings
– Phase 3: Pavers and drainage by zone on early weekdays
– Phase 4: Final plantings and touch-ups on a dark night
It is not magic. It is a calendar and crew discipline. Ask for a schedule with clear time blocks. If a team gets vague, ask for a day-by-day for week one. You do not need a novel. You need clarity.
How to measure success after you open
Set simple metrics before you build. Then check them.
– Seats added vs. plan
– Average check before and after, by daypart
– Table turns before and after, by daypart
– Peak wait times
– Guest comments about comfort and lighting
– Staff steps per shift on outside service
I like to run a five-question guest card for one week after launch:
– How comfortable was the seating?
– Was the lighting too bright, too dim, or just right?
– How easy was it to find your table?
– Did any scent or smoke bother you?
– Would you choose the patio again?
Keep it short. You are not writing a survey report. You are tuning the space. An extra dimmer or one more hedge panel can move the needle.
Questions and answers
How much time does a typical patio project take from plan to first seating?
For small refreshes, 3 to 6 weeks is common. For mid-scope projects with pavers and shade, 8 to 12 weeks works if permits move fast. Full builds can take a season. If you can, start design work during a slower month so you install before your busy period.
What plants are best if I want to cut garnish daily?
Mint, basil, chives, and shiso in raised planters near the bar are steady. Lemongrass at the edge of the dining area gives you volume and scent. Kaffir lime in a big pot is useful for leaves. Keep soil high quality, use drip lines, and harvest before service to keep things tidy.
What lighting color should I choose so my food looks good in photos?
Pick 2700K with high CRI near tables. Add one or two accent points to create depth behind the plate. Avoid cool white. It flattens reds and makes greens look dull. If you want a tiny boost for photos, keep a dimmable accent near a feature wall so guests get a nice background.
How do I keep mosquitoes and flies away without chemicals all over the place?
Air movement works. Use quiet ceiling fans or directional fans to keep air flowing across seating. Keep drains clean and dry between service. Run irrigation at dawn, not at dinner. Lower color temperature lighting attracts fewer insects than bright cool white. Herbs can help a little with scent, but fans carry most of the load.
Do I need permits for shade sails or a pergola in Honolulu?
Often, yes. Structures and electrical work usually need review. Sidewalk dining has its own rules. Ask your designer to map the path. Get clear on egress and drainage. Do not guess. A short meeting early with the right department can save weeks later.
What is one change that makes the fastest difference to guest comfort?
Real shade with solid anchoring. Secure sails or a fixed pergola calm the space. After that, warm lighting. Those two changes alone often boost how long people stay at the table.
Can I phase the project so I do not close during peak season?
Yes. Build a simple phasing plan with your contractor. Work nights for lighting and planters. Schedule pavers in small zones early in the week. Bring in extra staff for a soft launch of the new seating, then tighten after two weekends of feedback.
How do I pick the right team?
Ask to visit two patios they built on Oahu. Talk to the owners about how the projects aged after six months. Ask how they handle wind, drainage, and salt corrosion. If they speak clearly about those three, you are in good hands. And if you want a running start, talk to local teams like landscape designers Honolulu HI for site-specific advice.