Yes, you can build a beautiful outdoor dining space in Colorado Springs, and hardscaping is the backbone. Start with a stable, well drained patio that handles freeze and thaw, add wind and shade control, plan gas and power before you pour anything, then layer in lighting, seating, and heat. If you want help from a local team that understands the climate and codes, check out Colorado Springs hardscaping. That is the short answer. The longer one has a few more moving parts.
What actually works here, in this climate
Colorado Springs brings quick temperature swings, dry air, bright sun, and spring gusts that can knock over a cheap umbrella. Snow melts fast, then refreezes at night. That combination breaks weak bases and slicks up poorly chosen surfaces.
So the design has to do three things well:
- Drain fast without pooling
- Grip underfoot when wet or icy
- Stand up to UV and freeze cycles
Pick materials and details for drainage first, comfort second, looks third. If water does not move, the party does not either.
I learned this the hard way with a friend’s patio in Briargate. Great grill. Nice seating. We skipped a drain at the low corner. One March melt, water crept under the slab, then a cold snap popped two pavers. Easy fix later, but still, it stalled dinner plans that night.
Plan the hardscape like a kitchen line
Restaurant patios work because the space flows. You can take a page from that playbook at home. Think zones and traffic. Keep paths clear so nobody backs into a hot grill or steps on a hose.
Core zones to map before you build
- Cook zone: grill, smoker, pizza oven, or griddle. Place downwind of seating if you can.
- Prep and plate: counter space next to the heat. At least 30 inches wide, 24 inches deep.
- Serve run: clean path from cook to table, 36 inches clear minimum.
- Dining: chairs have room to pull back, plus space for people to pass.
- Landing zone: a side table near the dining area for pitchers, hot pans, or a cutting board.
Do a tape layout on the lawn and walk it with a tray. If the tray bumps your hip more than once, widen something now, not after concrete sets.
I like to start with the table you use the most. If you host six to eight people, size the patio so that group fits with 4 feet of free space around chairs. The rest folds around that.
Materials that hold up and feel good underfoot
Choose materials with grip and low water absorption. The options below are common in this area, and I will keep the trade talk simple.
| Material | Look | Slip in wet | Heat on feet | Freeze fit | Typical installed cost | Notes |
|---|---|---|---|---|---|---|
| Concrete pavers, 60 to 80 mm | Clean, uniform | Good with textured face | Moderate | Strong | $20 to $35 per sq ft | Easy to repair individual units; pick light to medium colors |
| Natural flagstone, set on base | Varied, warm | Good if cleft, poor if honed | Moderate to hot, depends on color | Good with correct base | $35 to $60 per sq ft | Needs tight joints and solid compaction to avoid wobble |
| Porcelain pavers, 2 cm | Modern, consistent | Good if R11 or higher | Cooler in lighter colors | Very good | $30 to $50 per sq ft | Use proper pedestal or mortar system; mind grout choice |
| Stamped concrete | Patterned slab | Varies; can be slick if sealed heavy | Hotter in dark tones | Crack control is key | $15 to $25 per sq ft | Add grit to sealer; plan joints with furniture layout |
| Decomposed granite with binder | Casual, rustic | Fair | Cool | Can rut in freeze cycles | $8 to $15 per sq ft | Good for lounge zones, not great for dining chairs with small casters |
One small caution. Dark slate looks amazing in photos, and I like it too, but on a July afternoon it can get hot. If you plan barefoot time, consider a lighter tone. Or plan sandals. I know that sounds basic. It matters.
For pavers, 6 inches of compacted base, a 1 inch bedding layer, then 60 mm units is a solid starting point. Thicker base if soil is soft or you plan a heavy kitchen island.
Base, drainage, and slope that keep the surface flat
Most patio failures trace back to the base. In this region, a little extra attention here saves you money and stress later.
Build the base in layers
- Excavate 8 to 12 inches below finished grade, more if you need room for drains.
- Lay geotextile fabric to separate soil from base material.
- Add 4 to 8 inches of class 6 road base in lifts. Compact each lift to 95 percent.
- Set slope at 1 to 2 percent away from the house.
- Add a 1 inch layer of screeded bedding sand for pavers, or set forms for a slab.
Aim for a 1 to 2 percent slope. That is about 1 to 2 inches of drop over 10 feet. Enough to move water, not enough to feel tilted at dinner.
If you have heavy clay, add a French drain at the low edge. If meltwater tends to flow toward your foundation, give it a trench drain to route along the patio edge. I have seen patios handle a quick thunderstorm just fine, then lose the battle to a gutter downspout. Tie downspouts into the drain plan too.
Seating and table layout that actually works
Comfortable seating needs space behind the chairs. Restaurant patios solve this with clear aisles. You can do the same at home.
| Item | Key dimension | What it affects |
|---|---|---|
| Chair pushback | 24 inches | Room to slide out without bumping a wall |
| Aisle behind chairs | 36 to 48 inches | Server path or guest flow |
| Round table for 4 | 42 to 48 inches diameter | Cozy seating without elbow fights |
| Rectangular table for 6 | 36 x 72 inches | Plates and platters fit without crowding |
| Table height | 28 to 30 inches | Comfort for long meals |
Two small moves that help a lot:
- Use two small tables you can push together. It flexes for 4 this week, 8 next week.
- Place a bench along a wall or rail. It saves space and adds seats for kids.
Once you place the table, set the grill 8 to 10 feet away and not directly upwind. Less smoke in faces. Simple, but easy to forget when you chase the perfect view.
Shade, shelter, and the wind factor
Sun at altitude feels stronger. Wind shows up on the one night you host. Plan for both.
Shade options that play well with BBQ smoke
- Pergola with open rafters: soft shade and air movement. Add a retractable canopy for bright days.
- Cantilever umbrella: aim for 11 feet so it covers an 8 person table. Pick a base over 150 pounds.
- Sail shade: fast to install, but plan strong anchors and a slight pitch so water does not pool.
Wind control that still feels open
- Tempered glass wind screens, 42 to 72 inches tall, on the windward edge.
- Planters with dense evergreens to break winter gusts.
- Louvered panels that you can open on calm nights.
Prevailing winds shift around the Front Range. I have set a small flag on site for a few afternoons and watched it. Low tech helps here. Aim to block the common wind direction without boxing in smoke from the grill.
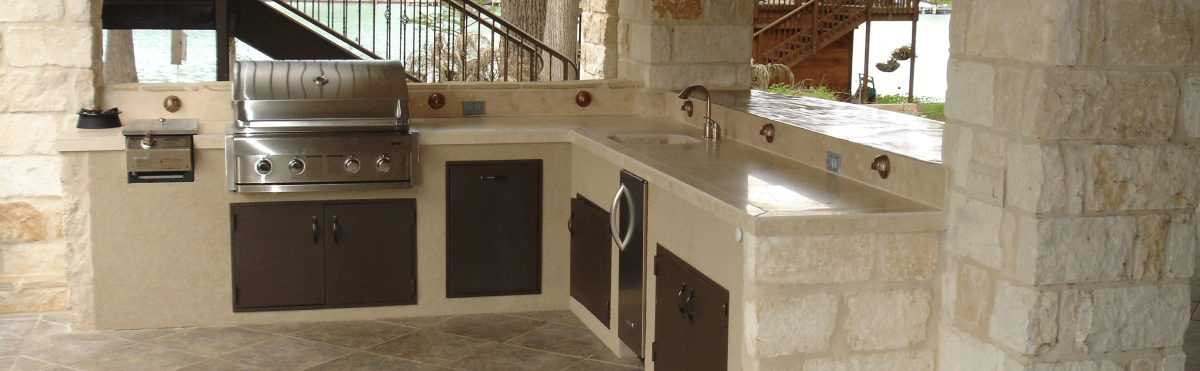
Cooking equipment and surfaces that perform
You do not need a full outdoor kitchen. A good grill and one helper surface handle most meals. If you like pizza or tacos, a small oven or a flat-top adds range. Be honest about what you cook most.
Heat sources to consider
- Gas grill: fast and simple. Plan a 3/4 inch gas line if you run more than one appliance.
- Pellet smoker: low and slow. Keep it out of the wind for stable temps.
- Pizza oven: portable models reach temp fast. Built units need a serious base and a flue.
- Flat-top griddle: great for smash burgers and veggies. Grease management matters, so add a cleanup plan.
Countertop materials for cooks
| Material | Pros for cooking | Cautions | Care |
|---|---|---|---|
| Granite | Heat tolerant, strong | Can stain if unsealed | Seal yearly, wipe spills quickly |
| Porcelain slab | Stain proof, UV stable | Needs proper support | Simple cleaning, no sealing |
| Concrete | Custom shapes and colors | Can hairline crack with temp swings | Good sealer and gentle cleaners |
| Stainless steel | Sanitary, easy to clean | Hot to touch in sun, shows scratches | Wipe down, shade where possible |
For heights, aim for 36 inches at prep counters and 42 inches at bar tops. Leave 6 inches of landing space on each side of the grill. I like 12 inches if you can spare it.
Lighting that sets the mood and helps you cook
Good patios use layers of light. You want to see the food, not blind your guests.
- Task lighting at the grill and prep: 3000K, 90+ CRI, shielded fixtures.
- Ambient string or pendant lights over dining: 2700 to 3000K warm tone.
- Step and path lights: low glare, spaced 5 to 7 feet apart.
- Accent lights for plants or walls: keep them subtle.
Run low voltage 12V lines early and leave extra conduit. If you add a pizza oven later, the wire is already there. A 150 to 300 watt transformer handles most patios. Add up the fixture watts and give yourself 20 percent headroom. I have seen people skip dimmers and regret it. Add them. Food looks better with softer light.
Heat for shoulder seasons
Nights cool fast here. Heat keeps guests at the table longer. It also takes stress off the cook, which I like, because rushing steaks is no fun.
| Heat type | Coverage | Clearance | Fuel | Notes |
|---|---|---|---|---|
| Gas fire pit | 6 to 8 feet radius | Keep open above and around | Natural gas or propane | Great for lounge zone, less for dining table |
| Overhead radiant heater | Up to 10 by 10 feet | Varies by model | Gas or electric | Best comfort in wind, plan clearance early |
| Portable propane heater | About 6 feet radius | Open air | Propane | Moveable, but bulky and tips in wind if light |
Radiant units shine on windy nights because they heat people and surfaces. I might sound picky here, but placing two smaller units at the edges often feels better than one big unit that toasts the top of your head.
Sound, comfort, and conversation
Hard surfaces bounce sound. That is the price of a clean patio. You can soften it without turning the space into a living room.
- Use seat cushions and an outdoor rug under the table.
- Add planters with dense plants to break up reflections.
- A small water feature can mask traffic or neighbor noise.
I aim for conversation levels in the 55 to 65 decibel range. You do not need a meter to hit that. If you can talk in a normal tone across the table, you are fine. If people lean in, add a little soft material.
Water, snow, and upkeep that do not eat your weekends
Most maintenance is simple if you plan for it.
- Seal concrete pavers and slabs every 2 to 3 years with a breathable sealer.
- Use a plastic edge shovel for snow to avoid chipping stone.
- Use calcium magnesium acetate, not rock salt, on stone surfaces.
- Cover grills and clean burners at season change.
- Check GFCI outlets and replace any tired gaskets.
- Blow out irrigation lines before hard freezes if you have planters tied into water.
I am cautious with glossy sealers on dining patios. They can get slick when wet. If you like a wet look, ask for grit additive and test a small area first.
Budget and timeline, with plain numbers
Prices move with materials and site access, but these ranges reflect common projects around the city. If your site is steep or needs a big retaining wall, costs rise. If access is wide open, costs drop.
| Item | Typical range | Notes |
|---|---|---|
| Paver patio, 300 to 500 sq ft | $20 to $35 per sq ft | Includes base, edging, and polymeric sand |
| Flagstone patio | $35 to $60 per sq ft | Material cost varies a lot by stone type |
| Outdoor kitchen island | $5,000 to $25,000 | Appliances swing the number |
| Pergola or shade structure | $3,000 to $15,000 | Manual canopy at the low end, motorized higher |
| Gas and electric runs | $1,500 to $4,000 | Longer trenching and panel upgrades add cost |
| Lighting package | $800 to $3,000 | Depends on fixture count and controls |
If money is tight, spend it on base and drainage. Plain pavers on a great base beat fancy stone on a weak one every time.
Timeline varies with weather and crew availability. A 400 sq ft patio with a simple kitchen often runs 2 to 4 weeks of field work, plus a few weeks of planning and ordering. Permits for gas or electric can add a little time. If you want it ready for May, start design by late winter.
A sample layout you can adapt
Let me share a layout that works for many backyards here. Adjust sizes to fit yours.
- Patio: 16 by 24 feet, pavers in a light gray tone.
- Cooking wall: 10 feet along one short side with a gas grill, 36 inches of counter, a 24 inch fridge, and a drawer base.
- Pizza corner: portable oven on a 36 inch cart, parked near the cooking wall.
- Dining: rectangle table 36 by 84 inches centered, seating for 8.
- Shade: pergola over the dining area with a retractable canopy.
- Wind: 60 inch glass screen on the west edge.
- Heat: two low profile electric radiant heaters tucked into the pergola.
- Lighting: task lights at the grill, soft string lights over the table, path lights on the steps.
- Drainage: French drain on the low south edge tied to a pop-up emitter in the lawn.
We ran a 3/4 inch gas line and a 20 amp circuit to the cooking wall. The client loves pizza nights in April now. Before the screen and heaters, they used the space mainly in July. Small changes, big use shift.
Mistakes to avoid, learned from real patios
- Zero slope at the table. Water under chairs is no fun.
- Dark, smooth stone where it ices. Pick texture.
- Small paver borders that trap chair legs.
- Grill too close to windows. Smoke drifts right inside.
- Gas line too small for a grill and a fire feature together.
- No landing space near the grill. Hot pans need a place to go.
- Umbrella too light. One gust, goodbye.
- No plan for storage. Tools end up on the ground.
Who to hire and what to ask
If you bring in a pro, ask for specifics. Not vague lines on a sketch.
- How deep is the base and how will you compact it?
- Where does the water go? Show me the slope and drains.
- What is the paver or slab slip rating when wet?
- How will gas and electric routes avoid frost heave and roots?
- What is your plan for wind and shade on this site?
- What is the warranty on the base and the surface?
- Can I see a patio you built two winters ago?
If the contractor answers fast and with clear drawings, that is a good sign. If they dodge on drainage, I would pause. I do not agree with the idea that any installer is fine for patios. The climate here is not gentle. You want someone who can explain the why, not just the what.
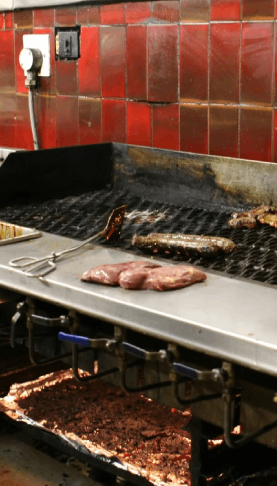
Ideas home cooks can borrow from restaurants
Restaurant patios are mini case studies. They need to serve fast, stay safe, and turn tables without chaos. A few tactics carry over nicely to a home kitchen patio.
- Keep a bussing station. A simple shelf or rolling cart near the table speeds cleanup.
- Design for trays. A 36 inch clear path saves spills.
- Place heaters so the center of the table stays warm, not just the edges.
- Set one strong light over the plating area. Food looks better when you can see its true color.
- Plan trash and recycling within 10 feet of the cook zone.
I tend to over plan plating space because I like to serve hot. You might be more casual. That is fine. Think about your style, then draw the space for that, not a catalog photo.
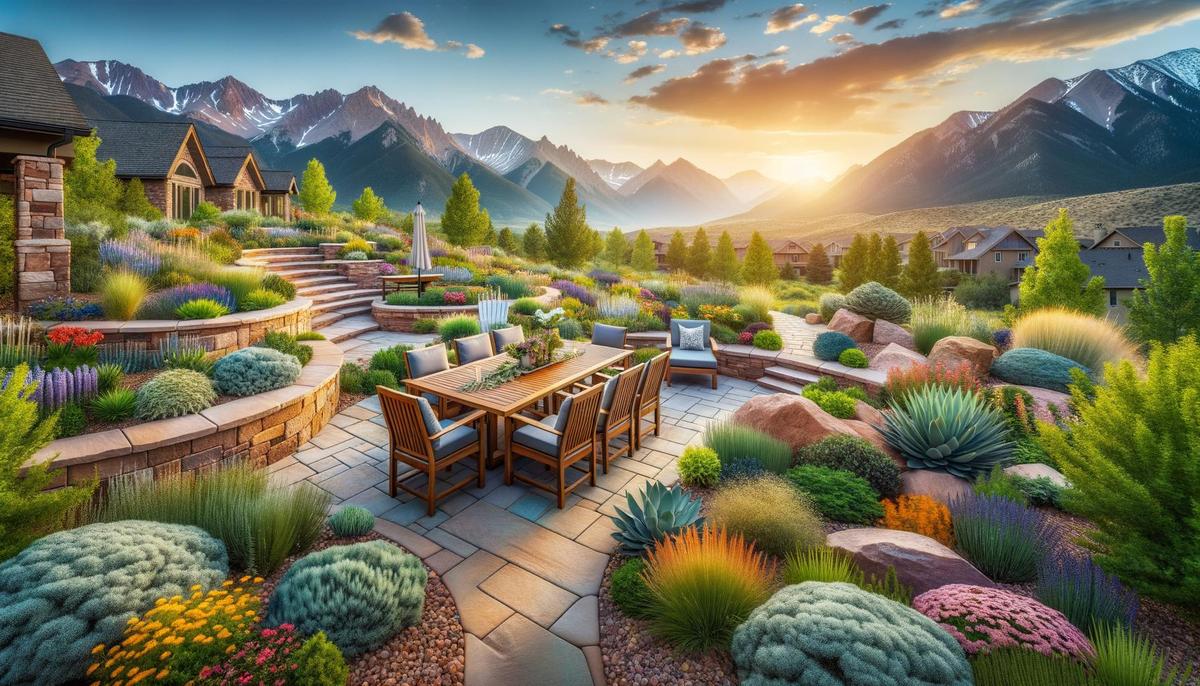
Planting that works with hardscape and food
Even a hardscape heavy patio needs a little green. It softens edges and helps with heat and sound.
- Herb planters near the cooking zone. Rosemary, thyme, chives, mint in separate pots.
- Drought tolerant perennials in beds along the edges. Yarrow, lavender, salvia do well.
- Small trees for dappled shade that drop less debris. Serviceberry or hawthorn are good picks.
Keep plant beds slightly lower than the patio with a steel edge. It protects your surface from mulch drift during storms.
Small details that help meals feel easy
- Two hose bibs or quick-connects, one near the cook zone and one near the planters.
- GFCI outlets on each end of the kitchen wall.
- A towel bar and a magnetic knife strip mounted under a counter lip.
- Hooks for grill tools at elbow height, not ankle height.
- A bin for kindling or pellets with a tight lid.
Not everything needs to be permanent. Rolling carts help a lot when you change the menu or the guest count. I keep one with pans, oils, and a small cutting board. It lives in the garage in winter.
Is DIY worth it
Maybe. A small paver patio with a simple layout is within reach if you enjoy physical work and can rent a plate compactor. The learning curve is not tiny. I am not trying to talk you out of it. Just be honest about time and tools. If you add gas, electric, or a roofed structure, bring in licensed trades.
Frequently asked questions
How big should my patio be to seat 8 people comfortably?
Plan a minimum of 12 by 16 feet for table and chairs, plus 3 to 4 feet around it for walking. If you want a grill nearby, add another 4 feet on the grill side.
Are porcelain pavers too slick for outdoor dining?
Pick tiles with an R11 or higher texture rating and you will be fine. Avoid honed or polished faces. Test a sample with water and a shoe with a flat sole. If it feels grabby when wet, it is good.
Can I put a pizza oven on a deck instead of a paver patio?
Yes if the deck structure is rated for the weight and the oven has the clearances the maker calls for. Many portable ovens are light enough. Heavy built units need an engineered base on grade.
What slope should I use so chairs do not feel tilted?
Keep it between 1 and 2 percent. That is enough for drainage without making drinks slide. If you are nervous, hold closer to 1 percent in the dining zone and use 2 percent where people do not sit.
Do I need to seal the patio?
Seal concrete and most pavers every few years. Use breathable sealers with a matte or satin finish for grip. Natural stone varies. Many do well with a penetrating sealer. Test first.
What is the best budget move if I cook a lot but funds are tight?
Build a right sized paver patio with a solid base, then add a good grill and a 30 inch prep counter. Shade can be a sturdy umbrella. Add heaters and a pizza oven later. The base lets you expand without rework.
Do I need permits?
For patios on grade, often no. For gas lines, electric, or a roofed structure, yes. Call your local building office or ask your installer to confirm. It avoids delays during inspection.
How do I keep the wind off without blocking the view?
Use a clear tempered glass screen on the windward edge and keep the rest open. Add a low planter to break floor level gusts. Try the layout with a temporary panel before you set posts.
Will darker pavers get too hot to walk on?
They can. Medium and light tones stay cooler. If you love dark colors, use them in shaded zones or mix with lighter borders.
What is one change that makes the biggest difference?
A well placed radiant heater above the dining table. It extends your season and makes nights calmer. People linger, and that makes the food you cooked feel worth the effort.