Bread artistry is a captivating journey, transforming a simple loaf into a stunning piece of edible art. This art form requires a blend of baking skills and creativity, often resulting in bread that is too beautiful to eat. If you are eager to delve into the world of bread artistry, this beginner’s guide is the perfect starting point for exploring the basics, techniques, and tips to help you craft your bread masterpieces.
Understanding the Basics of Bread Making
Before you can start crafting artistic bread, it’s crucial to understand the fundamentals of bread making. Bread typically consists of four basic ingredients: flour, water, yeast, and salt. Each component has a specific role in bread making:
– Flour provides the structure.
– Water activates the gluten and yeast.
– Yeast is responsible for fermentation, which makes the dough rise.
– Salt adds flavor and controls yeast fermentation.
Choosing the Right Flour
Flour comes in different varieties, each with unique characteristics that affect your bread’s texture and flavor. For instance:
– All-purpose flour is versatile and works for most bread recipes.
– Bread flour has higher protein content, suitable for chewy loaves.
– Whole wheat flour adds a nutty flavor and dense texture.
The Importance of Kneading
Kneading is a technique used to develop gluten, a protein network that gives bread its structure and chewiness. Proper kneading ensures your bread rises well and has a desirable texture.
Fermentation and Proofing
These stages are critical for flavor development and structure. During fermentation, yeast consumes sugars and produces carbon dioxide, causing the dough to rise. Proofing is the final rise of shaped dough before baking.
Finding Inspiration and Design Ideas
Bread artistry is about infusing personality and creativity into your loaves. Inspiration can come from various sources:
– Nature: Patterns from leaves, flowers, or natural landscapes.
– Culture: Traditional symbols, patterns, or techniques.
– Everyday objects: Textures and patterns that catch your eye.
Selecting Your Design
Choosing a design for your artistic bread should be based on your skill level and the occasion. Start with simple patterns and gradually move towards intricate designs as you gain confidence.
Key Techniques in Bread Artistry
Creating artful bread requires mastering a few techniques. Here’s a rundown of some essential skills:
Scoring
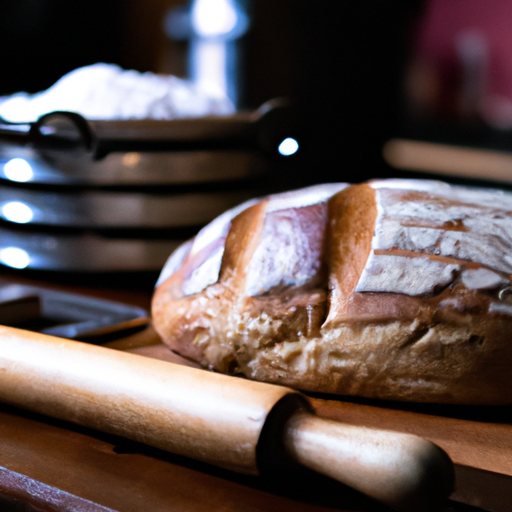
Scoring is the technique of cutting the surface of dough with a sharp blade, known as a lame, before baking. It controls how the bread expands in the oven and creates artistic patterns.
Stencil Use
Applying a stencil over your dough and dusting it with flour or cocoa powder can create striking contrast and designs.
Shaping and Decorating
Unique bread shapes and decorative elements can be achieved by braiding, knotting, or combining different dough types.
Color and Texture
Adding natural coloring agents like beet, spinach juice, or activated charcoal can create vibrant doughs. Seeds, grains, and nuts contribute to the texture and visual appeal.
Essential Tools for Bread Artistry
Equipping your kitchen with the right tools can make all the difference in bread artistry. Consider investing in the following:
– Lame: A razor-sharp tool for scoring dough with precision.
– Bench scraper: For cutting and handling dough.
– Baking stone or steel: Provides even heat distribution for a crisp crust.
– Dutch oven: Ideal for steaming the bread and achieving a shiny crust.
– Basting brush: For applying washes or glazes on your bread.
– Stencils: Templates for creating designs with flour or cocoa powder.
Preparing the Canvas: Making Your Dough
The first step in bread artistry is preparing your dough. Here’s a simple recipe to get you started:
Basic Artisan Bread Dough
Ingredients:
– 500 grams of bread flour
– 350 ml of lukewarm water
– 10 grams of salt
– 5 grams of dry yeast
Instructions:
1. Mix the yeast with the water and let it sit for 5 minutes until frothy.
2. Combine the flour and salt in a large mixing bowl.
3. Add the yeast mixture to the dry ingredients and mix until a rough dough forms.
4. Transfer the dough to a lightly floured surface and knead for about 10-15 minutes, until smooth and elastic.
5. Place the dough in an oiled bowl, cover with a cloth, and let it rise until doubled in size, about 1-2 hours.
6. Punch down the dough and shape it as desired. Let it proof again for another hour.
Scoring and Baking
Once you’ve shaped your dough and allowed it to proof, it’s time to score and bake:
Scoring Patterns
Having a clear design in mind, gently score your bread with the lame. Consider simple patterns like a cross, wheat stalk, or leaf for starters. The depth and angle of your cuts can affect the bread’s expansion and appearance.
Baking Strategies
Preheat your oven to a high temperature, around 450-475°F (230-245°C). You can create steam by placing a tray with water at the bottom of the oven or by baking in a preheated Dutch oven. Steam is crucial for a crispy crust and beautiful bloom in your scoring.
Maintenance and Care for Your Bread Artistry
To keep your artistic breads in top shape, follow these guidelines:
– Store bread in a cool, dry place, wrapped in a cloth or paper bag.
– Refresh stale bread by spraying with water and briefly reheating in the oven.
– Clean and maintain your tools properly; keep the lame blade sharp for accurate scoring.
Experimenting with Flavors and Ingredients
Once you’re comfortable with basic bread artistry, start experimenting with different flavors:
– Incorporate herbs, spices, or zest into your dough.
– Try different grains and flours for new textures.
– Include fillings like cheese, fruits, or nuts to surprise with each slice.
Joining the Community
Participate in online forums, social media groups, or local baking classes to connect with fellow bread artists. Sharing experiences and learning from others can inspire and improve your craft.
Advancing Your Skills
As you gain more experience, you can challenge yourself with advanced techniques:
– More complex scoring designs.
– Multi-color bread using different doughs.
– Experimenting with hydration levels for different bread textures.
Finishing Thoughts
Bread artistry is a rewarding hobby that combines the satisfaction of baking with the joy of creating beauty. As a beginner, remember to be patient with yourself. It’s okay to make mistakes; each loaf is a learning opportunity. Celebrate your successes, share your bread with others, and let the scent of fresh-baked bread inspire your next artistic endeavor. Keep practicing, experimenting, and refining your skills, and you’ll soon be on your way to crafting loaves that are as delightful to look at as they are to eat. Welcome to the wonderful world of bread artistry!
Frequently Asked Questions
What is bread artistry?
Bread artistry is the craft of creating visually appealing and artistic loaves of bread by manipulating the dough, adding natural colors, and using creative scoring techniques. It often involves a combination of baking skills and artistic talent to produce bread that is both delicious and aesthetically pleasing.
Do I need any special equipment to get started with bread artistry?
While no special equipment is strictly necessary, some tools can make the process easier. A good quality lame (a razor blade on a handle) for scoring, a bench scraper for handling dough, proofing baskets (bannetons) to give shape and structure, and a dutch oven for baking can all enhance your bread artistry experience. Basic items like mixing bowls, a kitchen scale, and measuring tools are also essential.
What type of dough is best for creating bread art?
Bread art can be created with various types of dough, but a well-hydrated and strong dough that holds its shape is typically best. Many bread artists prefer working with sourdough due to its flexibility and the robustness of the gluten network, which is good for holding intricate designs during baking.
Can I add colors to my bread? If so, what natural ingredients could I use?
Yes, you can add colors to your bread with natural ingredients. For example, beetroot powder can add a red hue, turmeric for yellow, matcha or spinach powder for green, activated charcoal for black, and purple sweet potato powder for purple. These natural colorings should be added during the mixing process for an even distribution of color.
How do I score bread properly?
Scoring bread involves making shallow cuts on the surface of the dough just before baking. This allows the bread to expand without cracking unpredictably. To score bread, hold the lame at a 30- to 45-degree angle to the dough’s surface and make quick, decisive cuts. The depth and design of the scores depend on the desired artistic effect and the bread type.
What’s the best way to practice my scoring techniques?
Becoming proficient in scoring takes practice. Start by watching tutorials to understand different techniques, and then practice on bread dough before baking. If you aren’t ready to practice on dough, you can use a piece of paper or cardboard with a similar texture. Always remember to relax your hand and make confident, swift cuts.
How do I ensure my bread art designs remain intact during baking?
To ensure your designs remain intact, you need proper dough fermentation and handling. Make sure the dough is well-proofed but not over-proofed as the latter will cause the designs to blur. Also, the temperature and steam during the early phase of baking are critical; steam helps the dough expand slowly and retain the design. Some bakers also reduce oven temperature slightly to preserve delicate patterns.
Are there any good resources for beginners to learn more about bread artistry?
There are numerous resources available for beginners, including online tutorials, social media groups, baking blogs, and books dedicated to the art of bread making. Some well-regarded books include “Flour Water Salt Yeast” by Ken Forkish and “Tartine Bread” by Chad Robertson. Online platforms like YouTube also host a variety of instructional videos from seasoned bread artists.
What are the basic steps to creating a bread art piece?
The basic steps to creating a bread art piece are mixing your dough with your desired colors, letting it ferment (bulk fermentation), shaping the dough, proofing, scoring, and finally, baking. Throughout this process, the temperature and handling of the dough are crucial to achieving the best artistic results.
Is it possible to create bread art with gluten-free dough?
While more challenging due to the lack of gluten, which provides the structure and elasticity essential for bread art, it is possible to create art with gluten-free dough. The key is to find a gluten-free recipe that holds its shape well and to be gentle with scoring since the dough is typically more delicate.
What common mistakes should I avoid when starting out in bread artistry?
Some common mistakes include overworking the dough, under or over-proofing, incorrect scoring depth, and not accounting for oven spring. It’s also important to maintain the dough at the right temperature and handle it with care to avoid deflating it. Start with simple designs and gradually work your way up to more complex patterns as you gain confidence and skill.


