
Here is the short answer if you run a restaurant kitchen and want zero leaks: do a 7-minute daily walk to check every sink and hose, keep drains and grease traps clear, keep water pressure near 50 to 60 psi, replace braided supply lines every 3 to 5 years, add water hammer arrestors on fast-close valves, put leak sensors under sinks and ice machines, train staff to report drips, and keep a simple map of shutoff valves at the line. If you need help setting this up, plumbers Lakewood can get it done in one visit.
Why a dry kitchen matters more than you think
Water on the floor slows service. It also ruins drywall, baseboards, and electrical. Health inspectors do not love wet floors. Guests do not love long waits. It all adds up.
I once watched a lunch rush stall because a 12 dollar dishwasher hose failed. Tiny split, big spray, staff scrambling with towels. Ticket times doubled. Food was fine, but the stress spread. That day convinced me that leak prevention is a daily habit, not a once-a-year chore.
You do not need fancy tools. You need a routine. Simple checks, done often, reduce surprises. And the kitchen runs smoother when people are not dodging puddles.
Dry floors, clear drains, right pressure, fresh hoses. Keep these four and most leaks never happen.
The 7-minute daily walk that catches 80 percent of leaks
Do this before prep starts. No crowd, no noise. Use a small flashlight and a dry paper towel.
- Open each base cabinet, wipe under P-traps and supply valves. If the towel picks up moisture, find the drip point now.
- Look at braided supply lines at sinks and the dishwasher. Any bulges or frayed steel braid means replace this week.
- Check the pre-rinse hose and spray head. Fine mist that hits the wall is still a leak.
- Glance at the floor around ice machines and soda racks. Thin water lines love to crack at fittings.
- Listen near the dishwasher and booster heater. Hissing can mean a pinhole spray you cannot see yet.
- Lift the floor drain grate with a hook. If you see fat, food, or mop strings, clean the strainer today.
- Walk the cold line, the hot line, and the mop sink. Touch valves for warmth or vibration. Both hint at flow when there should be none.
If you find water, stop and fix or tag it. Do not keep walking and hope it dries. Leaks grow under pressure and heat.
Weekly routine by zone
Short, repeatable tasks make a big difference. Here is a simple plan many kitchens use. Adjust to your layout.
| Zone | Task | How | Time |
|---|---|---|---|
| Prep sinks | Tighten slip joints, inspect P-traps, clean aerators | Hand tighten, replace worn washers, soak aerators in vinegar | 10 min per sink |
| Dish station | Check pre-rinse hose, valves, and vacuum breaker, wipe floor edges | Look for mist, replace hose washers, listen for hiss | 15 min |
| Grease trap | Skim solids, confirm baffles, check gaskets | Use a ladle and bucket, note thickness of grease cap | 10 min |
| Floor drains | Pull grates, clear strainers, pour enzyme or hot water | Gloves, drain brush, hot water flush, enzyme dose | 15 min |
| Ice machine | Inspect inlet line, drain, and shutoff valve | Check compression fittings, look for mineral crust | 10 min |
| Water pressure | Read gauge at mop sink or PRV | Log psi, aim for 50 to 60 psi | 2 min |
Parts that fail most in restaurant kitchens
Some parts have a short life because of heat, chemicals, and constant use. Swap them before they fail, not after.
| Part | Common failure sign | Replace by | Typical cost for part | Notes |
|---|---|---|---|---|
| Braided supply lines | Bulge, rust on braid, damp nut | Every 3 to 5 years | 10 to 25 | Use stainless braid, full port where possible |
| Pre-rinse hose and spray head | Fine mist, sticky trigger, cracked sheath | 12 to 24 months | 40 to 120 | High use area, keep a spare on site |
| Angle stop valves | Won’t fully close, seep at stem | 5 to 7 years | 10 to 30 | Quarter-turn ball valves last longer |
| Dishwasher hoses | Drips at clamp, soft spots near heat | 2 to 4 years | 15 to 60 | Heat and chemicals shorten life |
| Vacuum breaker | Constant dripping from vent | When drip starts | 30 to 90 | Protects water supply, replace promptly |
| Ice machine inlet line | White mineral crust at fitting | 3 to 5 years | 10 to 20 | Mineral build-up points to small leaks |
| Water hammer arrestors | Pipe banging on shutoff | When banging starts | 15 to 40 | Prevents shocks that cause leaks |
Water pressure and water hammer control
High pressure and sudden valve closures stress joints and hoses. Get both under control.
Set your pressure
- Target 50 to 60 psi in the kitchen.
- If your gauge reads over 70 psi, add or adjust a pressure reducing valve.
- Check pressure during peak hours and late at night. City pressure can change by time of day.
Stop pipe banging
- Install water hammer arrestors on dishwasher, ice machine, combi oven, and soda or coffee lines.
- Banging after a quick valve close means trapped shock waves. Arrestors absorb the shock.
- If banging returns, the arrestor may be waterlogged. Replace it.
Keep pressure near 50 to 60 psi. No pipe banging. Your hoses and seals will last longer.
Drains and grease: the quiet leak makers
Clogged drains push water where it should not go. Slow drains also invite staff to keep running water, which overflows. Grease is usually the reason.
Keep drains moving
- Install sediment baskets on floor drains near fryers and cook lines.
- Brush floor drains weekly, pull whatever you find, and flush with hot water.
- Use an enzyme treatment during close, not during service. Enzymes work better when left in the pipe overnight.
- Do not pour bleach or harsh caustics into traps unless a pro directs you. They can damage seals and cook grease into a rock.
Grease trap basics
- Log the thickness of the grease layer each week.
- Pump at 25 percent of liquid depth or at the cadence your city requires.
- Skim solids after heavy fry shifts.
- Check the lid gasket. A bad seal lets odors out and splashes out.
Clean drains and traps stop backups that look like leaks but come from below. If your floor drain burps when the dishwasher dumps, the line is tight and needs cleaning.
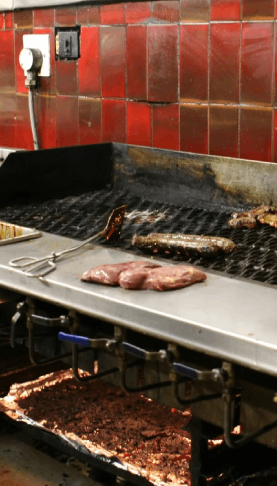
Dish area: where most leaks start
The dish pit is wet by design, but you still need control.
- Inspect the pre-rinse assembly. Replace the trigger if it sticks open.
- Look at the booster heater relief valve. If it drips, check pressure and temperature.
- Check the dishwasher door gaskets. Wear leads to spray outside the tank.
- Confirm the drain hose loops higher than the machine sump. This stops backflow.
- Caulk the back edge of dish tables where they meet the wall. Gaps let water creep under FRP panels.
If your dish pit floor is always wet, watch the workflow for five minutes. Often the spray pattern hammers a seam or the hose swings too far. Small habits cause steady water migration.
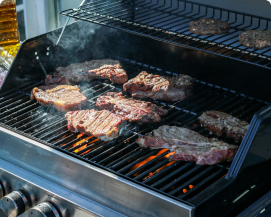
Cook line and prep sinks
Heat and movement stress fittings at the line. People bump valves and hoses during rush.
- Use quarter-turn ball valves for quick shutoff. They save time when something fails.
- Protect exposed lines with simple guards if your line is tight on space.
- Add thin trays under sink traps to spot drips in minutes, not days.
- Replace worn gaskets on hand sinks. A constant drip adds to your bill and your floor moisture.
On prep sinks, I like a strict rule. No heavy containers left inside bowls. They stress faucets and pull on supply lines. Silly maybe, but I have seen cracked faucets from a 20-quart pot left leaning overnight.
Sensors that notify you before damage spreads
Water sensors are cheap compared to a soggy wall. You do not need a full smart building system. A few smart pucks or wired sensors can send a text when they detect water.
- Place sensors under every sink, behind dish machines, near the mop sink, and at the base of ice machines.
- Pick battery models with a 2 to 3 year life or wired sensors if you have nearby power.
- Test alarms monthly with a damp paper towel.
- Label each sensor location in the app so staff knows where to look when they get an alert.
If budget is tight, start with the dish pit and ice machine. Those give you the biggest risk reduction right away.
Staff training that sticks
Leaks get worse when people ignore small signs. Give the team a simple script and a place to log issues.
Teach the 10-second check
- Open the base, touch fittings, look for drips.
- Listen for hiss or trickle when valves are closed.
- Report any moisture right away.
Use a leak log
| Date | Found by | Location | Issue | Action | Resolved |
|---|---|---|---|---|---|
| MM/DD | Name | Dish pit, hand sink, etc. | Drip at P-trap, mist at sprayer | Tightened, replaced, called pro | Yes/No |
Reward fast reporting. The person who finds a drip saved you money. A small gift card or a shout-out helps the habit stick.
Teach staff to speak up the second they see water where it should not be. Silence is expensive.
Emergency plan for water on the floor during service
Leaks still happen. How you respond in the first five minutes decides the outcome.
- Kill water at the nearest shutoff. If you do not know it, go to the main.
- Contain with a bus tub or hotel pans under the leak source.
- Lay down high traction mats and towels to avoid slips.
- Move food away from splash zones.
- Call your plumber and give them the exact location and valve type that failed.
- Assign one person to mop and watch the area, not multiple people.
Practice this once per quarter. You can even time it. Close the valve, contain, and call, all within five minutes. That pace keeps damage small and service alive.
Make a valve map
- Tag each valve with a simple label: HS-1 for hand sink 1, DW-SUP for dishwasher supply, and so on.
- Post a printed map in the kitchen and manager office.
- Add a QR code that opens the digital map on a phone.
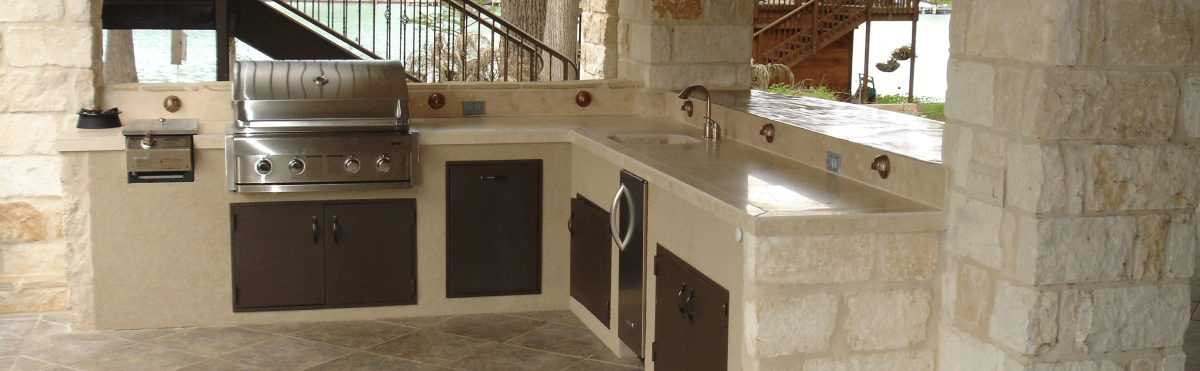
Design choices that prevent leaks in the first place
If you are building new or remodeling, small choices now save headaches later.
- Pitch floors toward drains, not away. Test with a cup of water during the build.
- Use coved bases where floor meets wall to stop water creep.
- Add extra floor drains near dish and fryer areas. One drain per 100 to 150 square feet is a simple guideline, but test your workflow.
- Keep access panels for all valves. Hidden valves cost time.
- Use flexible connectors rated for commercial use, not light duty home parts.
- Install hammer arrestors and a pressure reducing valve while walls are open.
- Seal every penetration with sanitary caulk. Do not leave gaps behind equipment.
I like to see a mop sink placed near the dish pit and a second one near the cook line. Less hauling of heavy buckets, less slosh on the floor.
Seasonal and local factors that change the plan
In places with cold winters, pipes near exterior walls face freeze risks. Lakewood gets cold snaps. Insulate backflow preventers and exposed lines. Leave heat on low in small utility rooms overnight. Prop doors as little as possible when snow deliveries show up.
Water hardness also matters. If you see white crust on faucet tips and machine fittings, your water likely carries minerals. Hard water eats gaskets and seats faster. Consider a test kit or ask your service provider for recent readings. A softener or a scale filter on the dish machine can lengthen the life of hoses and valves.
Food safety links to leak control
Water that pools near food prep is more than a trip hazard. It can spread soil and attract pests. Clean, dry floors help you pass inspections and keep your team safe. A clean dish area and tidy drains also reduce odor, which guests will notice near the dish drop or restrooms.
Maintenance cadence that works for most kitchens
If you like schedules, this one covers the basics without taking your week.
- Daily: 7-minute walk, floor drain quick check, sensors test spot check.
- Weekly: Trap skim, drain brush, valve and hose visual checks, pressure log.
- Monthly: Tighten slip joints, replace worn washers, clean aerators, clean ice machine filter if present.
- Quarterly: Enzyme treatment plan review, hammer arrestor check, booster heater relief check.
- Yearly: Full hose audit, replace any line older than 5 years, review valve map with staff.
Cost of prevention vs cost of a leak
A quick look at typical costs. Your numbers may vary, but the pattern holds.
| Preventive step | Cost range | What it avoids | Potential savings |
|---|---|---|---|
| Replace braided hoses on schedule | 20 to 60 per sink | Burst hose during service | 500 to 3,000 in damage and lost sales |
| Add water sensors | 25 to 70 each | Hours of unnoticed leaking | 250 to 2,000 in repairs |
| Pressure reducing valve and set to 55 psi | 150 to 400 | Stressed seals and hammer | Longer life for hoses and valves |
| Quarter-turn valve upgrades | 10 to 30 per valve | Slow emergency response | Faster shutoff during leaks |
| Grease trap maintenance | Service contract or weekly staff time | Backups and pipe damage | Fewer service calls and fines |
Simple tools to keep on hand
You do not need a full shop. A small bin covers most fixes until help arrives.
- Adjustable wrench and channel locks
- Plumber’s tape and a set of washers
- Extra braided supply lines, common lengths
- Hose clamps and stainless screws
- Flashlight and inspection mirror
- Drain brush and a grate hook
- Leak sensor batteries
- Colored valve tags and a marker
Common mistakes that quietly cause leaks
- Overtightening slip joints, which cracks plastic nuts
- Skipping aerator cleaning, which raises pressure on seals
- Leaving mat edges touching floor drains, which slows flow
- Hanging heavy sprayer heads by the hose, which strains fittings
- Storing chemicals under sinks, which hides slow drips and damages finishes
- Ignoring small mineral crust at fittings, which flags a tiny, constant leak
I have been guilty of two of these. I overtightened a trap once and it cracked a week later. Looked solid at first, then failed during a busy prep. Lesson learned.
How to choose replacement parts that last
Food service environments are rough on parts. Buy for that reality.
- Pick NSF rated components where they apply.
- Get stainless over plastic where the hose sees heat or movement.
- Choose quarter-turn valves with metal handles.
- Use high temp hoses on dish equipment.
- Keep brands consistent on the dish line if possible. Parts fit better and staff recognizes them.
When to call a pro right away
- Any leak near electrical panels or motor housings
- Recurring floor drain backups during service
- Water hammer that returns after arrestors
- Booster heater relief valve discharge
- Backflow preventer discharge or freeze damage
You can fix many small leaks in-house, but the items above can get worse fast or involve safety. A quick call protects your staff and space.
A short, realistic protocol your team can follow
Before open
- Daily walk, 7 minutes.
- Log pressure reading.
- Brush the busiest floor drain.
During service
- Keep mats clear of drains.
- Hang sprayer on the hook, not the hose.
- Report drips. No waiting.
After close
- Enzyme dose in drains.
- Quick towel check under sinks.
- Confirm sensors are active.
A quick note on documentation
Logs and photos help with inspectors and insurance. Snap a picture of the leak fix and add it to the log. If you pump the trap, keep the receipt with dates. This takes a few extra minutes each week, but it reduces stress during audits or claims.
What about older buildings
Older spaces often have mixed plumbing, old copper next to newer PEX or steel. Fittings can be quirky. Do not force threads that do not match. If a joint keeps seeping after you redo it once, it likely needs a different fitting or a pro. Trying a fourth time at 10 pm tends to make it worse. Seen it too many times.
How this ties back to food and the guest
A quiet, dry kitchen helps your cooks move faster and safer. Pans land where they should. There is no shuffle over a wet patch. Your sauce stays on the plate, not on a floor mat. Slightly better flow in the kitchen often shows up as steadier ticket times. Guests notice that, even if they never see the kitchen.
FAQ
How often should I pump the grease trap?
Pump when the floating grease layer and settled solids reach about 25 percent of the trap volume, or at the cadence your city requires. Many busy fry kitchens go every 1 to 3 months. Log the thickness each week so you can plan the next service.
What water pressure should I aim for?
Most kitchens run well at 50 to 60 psi. Over 70 psi puts stress on hoses and valves. Check with a gauge at the mop sink or near the PRV during peak and during off hours.
Do water sensors really help?
Yes. A 30 dollar sensor can save hundreds by catching a leak overnight before it spreads. Start with the dish area and the ice machine base, then add more locations over time.
When should I replace braided supply lines?
Swap them every 3 to 5 years, or sooner if you see bulges, rust, or damp fittings. Keep a couple of common lengths on the shelf so you can change one in minutes.
Who should I call for a leak in Lakewood?
If it is minor and you can stop it fast, follow the steps above and schedule service. If you cannot stop it or it involves gas, power, or a main line, call a local pro now. If you want a one-time setup of pressure control, arrestors, sensor placement, and a valve map, reach out to plumbers who work restaurants often. If you need help in the area, plumbers Lakewood can set standards and leave you with a simple routine.