Sourdough bread has made a significant comeback in recent years. It’s not just a staple in artisan bakeries, but also in home kitchens around the world. The rise in popularity is attributable to its unique tangy flavor, chewy texture, and the satisfaction that comes with nurturing your own living culture of wild yeast and bacteria. The journey to baking the perfect loaf begins with creating a sourdough starter.
Understanding Sourdough Starters
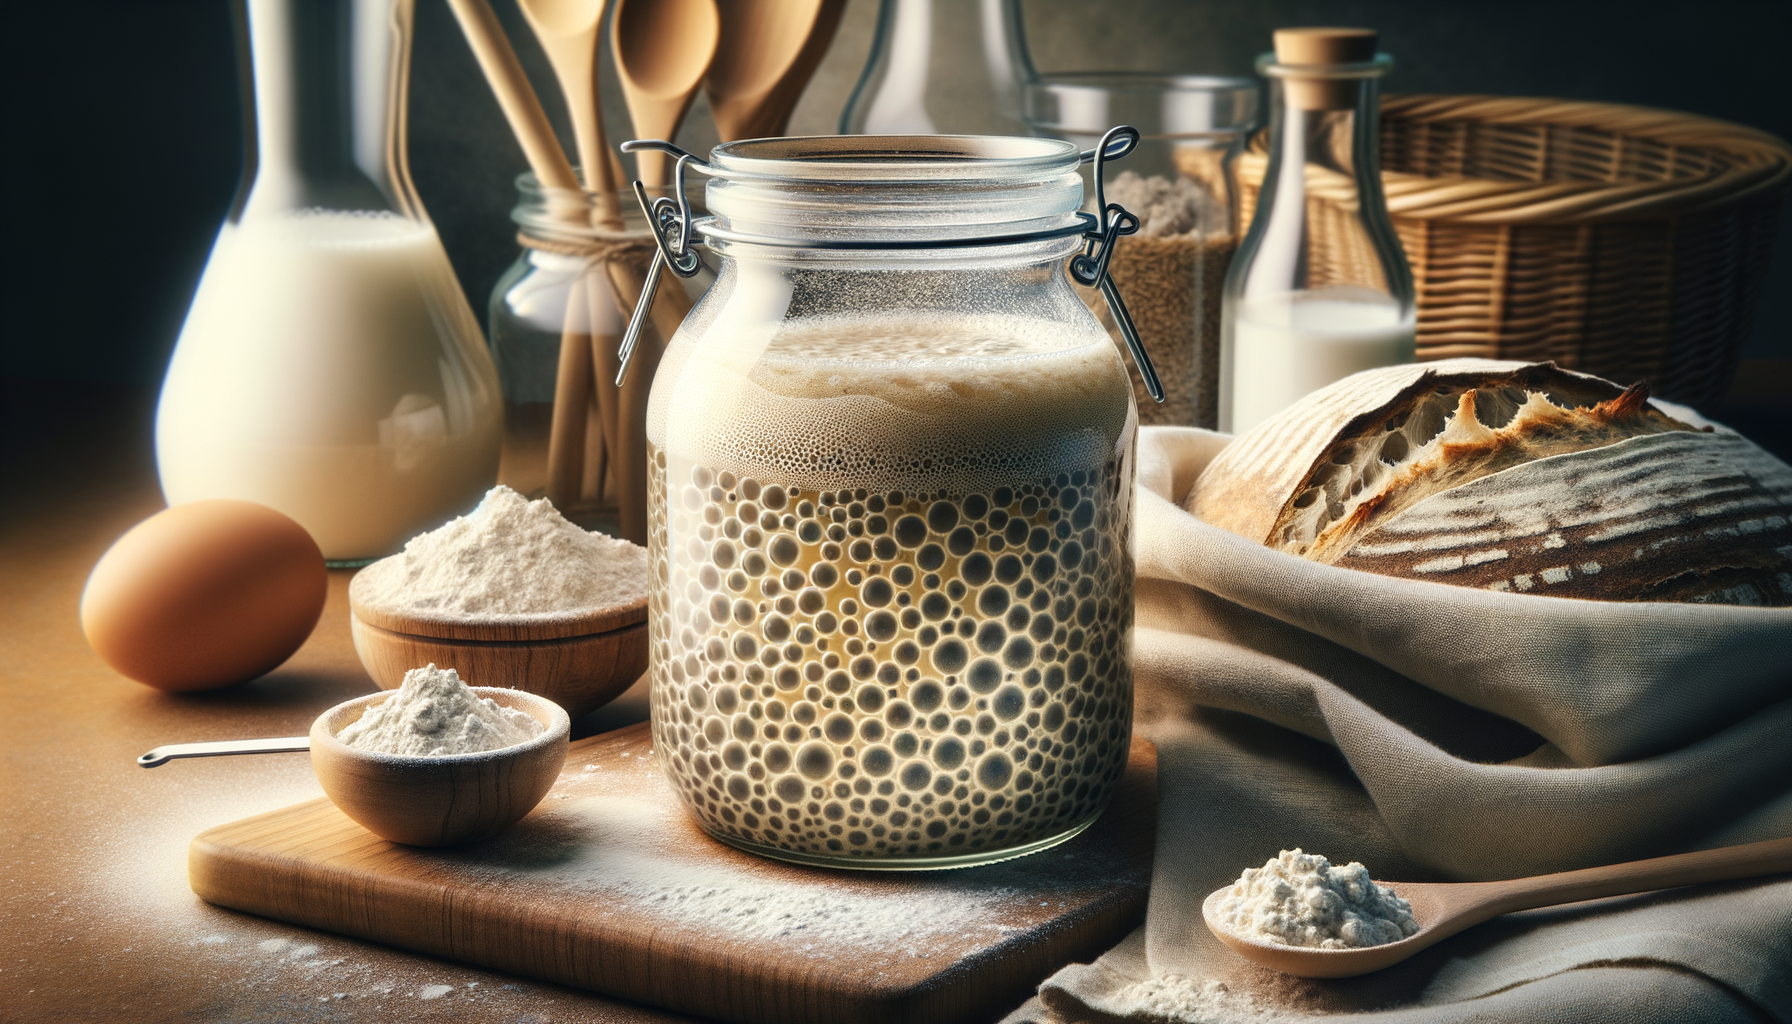
A sourdough starter is a simple mix of flour and water that captures wild yeast and bacteria from the environment. Over time, these microorganisms ferment the mixture, leading to a bubbly, sour-smelling paste that can leaven bread naturally. Unlike commercial yeast, sourdough starters require regular feeding and can last indefinitely when properly cared for.
What’s In a Starter?
Sourdough starters contain naturally occurring lactobacilli and wild yeasts. The lactobacilli are bacteria that produce lactic acid, which gives sourdough its distinctive tangy flavor. The wild yeasts are responsible for the rise, creating carbon dioxide as they consume the carbohydrates in flour. This beautiful synergy is what makes sourdough unique compared to bread made with commercially produced yeast.
Creating Your Sourdough Starter
The creation of a sourdough starter is a simple yet fascinating process. It requires few ingredients but plenty of patience.
Gathering Your Ingredients and Equipment
You’ll need:
– Flour: A blend of whole grain and white flour often works best. Whole grain flour is rich in nutrients and microorganisms, making it ideal for capturing wild yeast.
– Water: Lukewarm, preferably filtered or dechlorinated water, as chlorine can inhibit the growth of wild yeast.
Equipment:
– A glass or plastic container: Avoid using metal, as it can react with the acidity of the starter.
– A scale or measuring cups: Precision is important for maintaining the correct hydration levels.
– A spatula or spoon: For mixing your starter.
– A cloth or paper towel: To cover your container, allowing the starter to breathe while keeping out contaminants.
Step-by-Step Instructions
1. Day 1: Mix approximately 50 grams of whole grain flour with 50 ml of lukewarm water in your container. Stir until all the flour is hydrated, and no dry lumps remain. Cover loosely with a cloth or paper towel to allow air circulation and leave it at room temperature.
2. Day 2-7: Twice a day, morning and evening, discard half of your starter (or give it to a friend or use it in other recipes). Feed what’s left with equal parts flour and water by weight, typically 50 grams of each. Stir well, cover, and leave it at room temperature.
3. By Day 3-4: You should start to see some bubbles and an increase in volume, indicating wild yeast activity. The aroma will start to change, sometimes smelling fruity, other times resembling cheese or beer.
4. Day 5-7: Your starter should be quite active by now, doubling or tripling in volume between feedings, with a pleasant sour smell. It should be ready to use once it can consistently double in size within 4-6 hours after feeding.
Some starters may take longer to establish, sometimes up to 2 weeks, depending on the environment and temperature. Patience is key.
Maintaining and Storing Your Starter
Once established, the starter requires regular feeding if kept at room temperature, ideally once every day. If you plan to bake less frequently, you can store your starter in the refrigerator and feed it once a week.
Tips for a Healthy Starter
– Always use clean utensils and containers when handling your starter to avoid contamination.
– If your starter develops a layer of liquid on top (often called “hooch”), you can pour it off or stir it back in before feeding.
– If you notice any mold or unpleasant odors, it’s best to discard your starter and begin again.
Feeding Your Starter
When feeding your starter, always remember the ratio of old starter to fresh flour and water should be 1:1:1 by weight. This ensures that the microorganisms have enough food to stay active.
Using Your Sourdough Starter
Once your starter is established, it’s time to bake. Here’s a basic method to incorporate your sourdough starter into a loaf of bread:
1. Prepare the Leaven: The night before you plan to bake, mix a small amount of your starter with flour and water to create a larger, more active leaven.
2. Mixing the Dough: Combine your leaven with flour, water, and salt. Knead or fold according to your preferred method.
3. Bulk Fermentation: Let the dough rise until it’s roughly doubled in size.
4. Shaping: Shape the dough into a loaf and place it in a proofing basket or on a lined tray.
5. Final Proof: The dough needs to rise again, but not double this time, as it still has to rise in the oven.
6. Baking: Score the top of the dough to help it expand in the oven, then bake at a high temperature until golden and cooked through.
Experimenting and Troubleshooting
Your sourdough journey will be full of experiments and tweaks. You might adjust hydration levels, try different flours, or alter your fermentation times. Each change can significantly impact the final bread’s texture, flavor, and appearance.
Common Troubleshooting Tips
– If your bread isn’t rising as much as you’d like, make sure your starter is active enough and consider increasing the bulk fermentation time.
– A dense loaf might require more water in your dough or a longer kneading/folding process to develop gluten properly.
– If the bread is too sour, you may want to reduce the amount of starter used or shorten the fermentation times.
Remember, sourdough baking is as much an art as it is a science. Intuition and experience play significant roles in mastering the craft.
Finishing Thoughts
Embracing the sourdough journey is a commitment to learning and growth. Each step, from creating your starter to pulling a beautiful loaf out of the oven, is filled with potential and discovery. As you refine your technique, you’ll find that sourdough is more than just bread; it’s a labor of love and a testament to the beauty of patience and care. Keep nurturing your starter, and it will reward you with delicious bakes for years to come.“`html
Frequently Asked Questions
What is a sourdough starter?
A sourdough starter is a fermented mixture of flour and water that contains wild yeast and bacteria. It is used to leaven and flavor sourdough bread and other baked goods. Over time, the starter develops a complex, tangy flavor that is characteristic of sourdough products.
How do I make a sourdough starter?
To make a sourdough starter, mix equal parts flour and water in a clean jar or container. Stir until you have a smooth batter, then cover loosely and let it sit at room temperature. Feed your starter daily by discarding half of it and adding fresh flour and water. It will take about 5-7 days for your starter to become active and ready for baking.
What type of flour should I use for my starter?
While you can use all-purpose flour to create a sourdough starter, many bakers prefer using whole grain flours like rye or whole wheat to begin. These flours often contain more natural yeast and bacteria, which can help the starter develop more quickly. Once established, you can transition to feeding your starter with the flour of your choice.
How often should I feed my sourdough starter?
In the beginning, you should feed your starter at least once a day. Some bakers recommend feeding it twice a day to help it become more vigorous. Once your starter is well-established and strong, you can move to a less frequent feeding schedule if you’re not using it daily.
Why do I need to discard part of my starter?
Discarding part of your starter helps to manage the quantity and keeps it from becoming excessively large. It also ensures that the remaining starter receives enough flour and water to keep it healthy and active. Think of it as replenishment with fresh food for your yeast and bacteria.
Can I use the discarded sourdough starter?
Absolutely! The discarded sourdough starter can be used in a variety of recipes, like pancakes, waffles, or flatbreads. It provides a tangy flavor and can help reduce waste.
What if my sourdough starter isn’t rising?
If your sourdough starter isn’t rising, it may need more time to develop. Make sure you’re feeding it regularly and keeping it at a consistent, warm temperature. If it still isn’t rising after several days, try feeding it with a different type of flour, like rye or whole wheat, which may give it a boost.
How do I know if my sourdough starter is ready to use?
Your sourdough starter is ready to use when it has doubled in size within 4 to 6 hours of feeding and passes the float test. To perform the float test, drop a small spoonful of your starter into a bowl of water; if it floats, it’s ready to leaven bread.
Can I keep my sourdough starter in the refrigerator?
Yes, if you don’t plan on baking with your sourdough starter every day, you can keep it in the refrigerator. This slows down the fermentation process and requires you to feed it only once a week. When you’re ready to bake, take it out of the fridge, let it reach room temperature, and feed it until it becomes active again.
How long can a sourdough starter last?
A sourdough starter can last indefinitely if properly maintained. As long as you continue to feed and take care of your starter, it can be a lifelong baking companion. Some sourdough starters have been passed down for generations!
“`