Starting your own sourdough from scratch is an exciting venture into the world of natural leavening, where the simplest ingredients—flour and water—magically transform into a bubbling, aromatic starter that can leaven bread. This process harnesses the power of wild yeasts and bacteria in the environment and within the flour itself. The result is bread with a distinctive taste, a slightly tangy flavor, and a texture unmatchable by commercial yeast.
Understanding Sourdough
Before diving into the creation of your sourdough starter, it’s important to understand what sourdough is. Sourdough isn’t just a style of bread; it refers to a method of leavening bread using naturally occurring lactobacilli and yeast. Unlike commercial yeast, which consists of only a single strain of yeast, sourdough culture is a symbiotic culture of bacteria and yeast (SCOBY) that exists in a harmonious balance.
Creating Your Sourdough Starter
Gathering Supplies
To begin your sourdough journey, first, gather the necessary supplies. You’ll need:
– A digital kitchen scale: Precision is key in sourdough baking.
– Two medium-sized glass or plastic jars: Avoid metal, as it can react with the sourdough culture.
– A non-metallic stirring utensil: A wooden spoon or a silicone spatula works well.
– A breathable cover: A cloth or paper towel secured with a rubber band is perfect.
– All-purpose or whole grain flour: Organic is preferable due to its microbiological activity.
– Filtered or dechlorinated water: Chlorine can inhibit the growth of your culture, so use filtered or bottled water if your tap water is chlorinated.
Mixing the Initial Batch
The first step to creating your starter is simple:
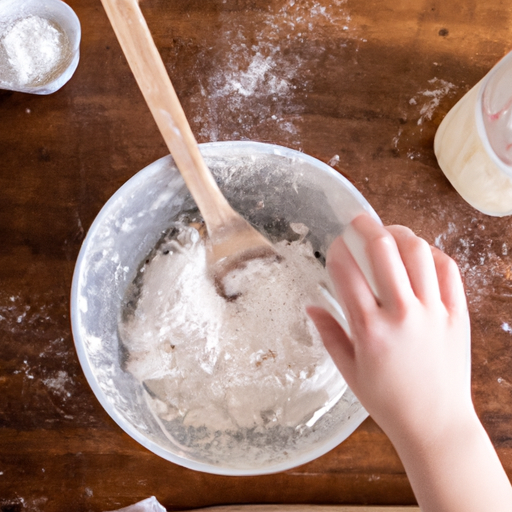
1. On the first day, combine 100 grams of flour with 100 grams of water in one of your jars. The mixture should be like a thick pancake batter.
2. Stir vigorously to incorporate air. The natural yeasts thrive in a slightly aerobic environment.
3. Cover the jar with a breathable cover and secure it with a rubber band.
4. Place the jar at room temperature, ideally between 68-75°F (20-24°C), away from direct sunlight.
This mixture needs time to capture wild yeast and bacteria. Over the next 24 hours, you may see little to no activity, which is completely normal.
Feeding and Growing Your Culture
Feeding your starter is crucial to its development. Here’s how to do it:
1. On the second day, you may notice a few bubbles, which indicate the presence of wild yeast and bacteria.
2. Whether or not you see bubbles, discard half of the starter (about 100 grams) and add another 100 grams each of flour and water.
3. Stir to combine, cover, and let sit.
Repeat this process for the next several days. You will gradually notice more bubbles and an increase in volume within several hours after feeding as the starter becomes more active. By about the fifth day, the starter should have doubled in volume within 4 to 6 hours of feeding and have a pleasant sour smell. If your starter isn’t doubling in size, maintain the feeding schedule until it becomes more vigorous.
Known Issues and How to Address Them
– If liquid (often referred to as “hooch”) appears on the surface, it indicates that the starter is hungry and needs to be fed more often.
– If mold appears, discard the starter, thoroughly clean the jar, and start again. Mold usually indicates contamination or poor environmental conditions.
– Pay attention to the temperature, as a cooler environment can slow down the growth of your culture.
Maintaining Your Sourdough Starter
Once your starter is established, it does not require the same intense feeding schedule. There are two ways you can maintain your sourdough starter:
Room Temperature Maintenance
For those who bake often:
1. Keep your starter at room temperature, feeding it once a day by discarding half the starter and adding equal parts water and flour.
2. The exact amount of starter you maintain depends on how much you need for baking. Usually, maintaining about 200 grams is sufficient for most home bakers.
Refrigerator Maintenance
For infrequent bakers:
1. Once your starter is vigorous and healthy, you can store it in the refrigerator with a tight lid.
2. Feed it once a week using the same method as room temperature maintenance. Allow the starter to sit at room temperature for a couple of hours before returning it to the fridge.
3. The day before you plan to bake, take the starter out, discard all but a small amount, and feed it twice at room temperature to reinvigorate it.
Understanding the Baking Process with Sourdough
The Importance of Autolyse
Autolyse is a rest period after initially mixing flour and water but before adding the starter and salt. It allows the flour to fully hydrate and initiates gluten development, which leads to less kneading and a more extensible dough.
Bulk Fermentation
Unlike commercial yeast, sourdough ferments much slower. Bulk fermentation can last anywhere from 3 to 5 hours or even longer, depending on the environment and the starter’s activity. During this time, you perform periodic stretches and folds to help strengthen the gluten network.
Shaping and Proofing
After bulk fermentation, the dough is shaped and then left to proof. Sourdough’s final proofing can be done at room temperature or in a refrigerator (“cold proofing”), which can extend the fermentation and develop more flavor.
Baking with Steam
The initial baking stage often incorporates steam to keep the crust soft and allow for maximum oven spring. Amateur bakers use methods like pouring boiling water into a preheated pan at the bottom of the oven or spritzing the oven walls with water. After the initial steamy phase, the bread finishes baking in a dry oven to develop a crisp crust.
Cooling
Allow your baked sourdough to cool completely on a wire rack before slicing. Cutting into a hot loaf can result in a gummy texture since the interior continues to set as it cools. Patience is critical here!
Exploring Sourdough Variations
Different Flours
Each type of flour brings its character to sourdough. Whole wheat flour, rye flour, spelt, and others can be used wholly or partially to introduce new flavors and textures. Experimenting with different flour combinations can be quite rewarding.
Incorporating Add-Ins
Nuts, seeds, dried fruits, herbs, and cheeses are examples of add-ins you can incorporate into your sourdough bread to add texture and flavor. Be mindful not to overload the dough, and adjust hydration accordingly.
Finishing Thoughts
The journey of creating your own sourdough starter from scratch is an adventure in patience, observation, and learning. It connects you to an ancient tradition of bread-making that feels immensely satisfying and grounding. With your own starter, you don’t just bake bread; you foster a living entity that can yield countless loaves harnessing the unique environment of your own kitchen.
Starting simply does not mean ending simply. Sourdough’s complexity unfolds as you become more comfortable with the processes and variables involved. There are always new techniques to master, flavors to try, and loaves to share. Sourdough truly is an art that reflects both the baker’s skill and their relationship with the living culture in their care. Welcome to the endlessly fascinating world of sourdough.
Frequently Asked Questions
What is sourdough and how is it different from regular bread?
Sourdough is a type of bread made from naturally occurring yeast and bacteria in flour. Unlike regular bread, which is made with commercially produced yeast, sourdough fermentation relies on these wild cultures to leaven the dough. This process gives sourdough its characteristic tangy flavor, chewy texture, and often, a crisper crust.
How do I make a sourdough starter from scratch?
To make a sourdough starter from scratch, mix equal parts flour and water in a jar or container. Use whole grain flour for the initial mixture, as it contains more nutrients to feed the yeast and bacteria. Cover the mixture loosely and let it sit in a warm place. Feed it daily by discarding half the starter and adding fresh flour and water. Within 5 to 7 days, your starter should begin to bubble and have a pleasant sour smell, indicating it’s ready to use.
What type of flour should I use for my starter?
Initial feeds are best with whole grain flours like whole wheat or rye, as they are rich in nutrients and ferment more quickly. After your starter is established, you can transition to all-purpose or bread flour for maintenance, depending on the flavor and texture you prefer.
How often should I feed my sourdough starter?
When developing your starter, feed it once a day at the very least. Once established, if you keep it on the countertop, it should be fed once or twice daily. If you store it in the refrigerator for a more dormant state, you can feed it once a week.
Can I make sourdough bread with just flour, water, and salt?
Yes, the essential ingredients for basic sourdough bread are flour, water, and salt. The natural yeasts and bacteria in the sourdough starter will act as the leavening agents, so commercial yeast is not necessary.
How long does it take to make sourdough bread?
Making sourdough bread is a time-intensive process that can take anywhere from 12 to 48 hours from start to finish. This includes making the leaven, bulk fermentation, shaping, proofing, and baking. The specific time depends on factors such as the temperature of your environment and the activity of your starter.
What temperature should water be for sourdough bread?
The water used in sourdough bread should be at a temperature that encourages fermentation but doesn’t harm the natural bacteria and yeast. A good range is between 75°F and 90°F (24°C to 32°C). Always adjust the temperature depending on your kitchen’s temperature to maintain a consistent dough temperature.
Why is my sourdough bread not rising?
There could be several reasons why your sourdough bread isn’t rising. The most common issues are an inactive or young starter, incorrect temperatures during fermentation, or insufficient gluten development. Ensure your starter is active and bubbly before use, keep the dough in a warm environment, and properly knead it to develop the gluten.
How do I know when my sourdough bread is done baking?
Sourdough bread is typically done when it has a deep golden-brown crust, and sounds hollow when tapped on the bottom. An instant-read thermometer inserted into the center should read around 200°F to 210°F (93°C to 99°C). This indicates that the interior is fully baked.
Can I bake sourdough in a regular oven?
Yes, sourdough can be baked in a regular oven. For best results, preheat a Dutch oven or a baking stone to mimic the heat distribution found in professional bread ovens. Steam can be introduced by spritzing water into the oven or adding a tray of water to create the desired crust.
Is sourdough bread healthier than regular bread?
Sourdough bread is often considered healthier than regular bread due to its fermentation process. The natural fermentation can make it easier to digest, lower the bread’s glycemic index, and increase the availability of certain nutrients. The probiotics and prebiotics found in sourdough can also benefit gut health, but it ultimately depends on individual dietary needs and how it fits into your overall diet.